Pineapple Bars
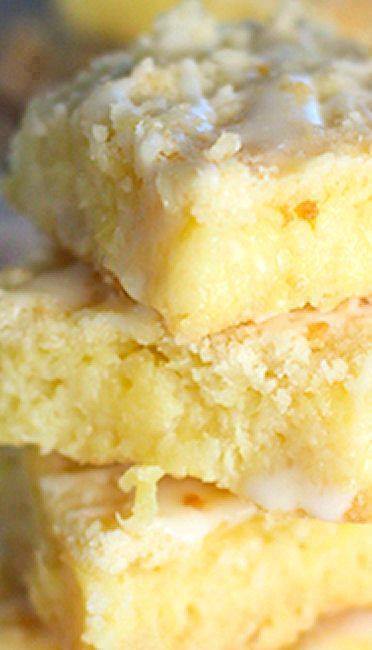
If you’re looking for a delightful treat that perfectly balances tropical flavors with a satisfying crunch, then these Pineapple Bars are just the thing for you! Imagine biting into a bar where the sweet, tangy pineapple filling is nestled between a buttery crust and a crumbly topping, all drizzled with a rich coconut glaze. It’s like a mini-vacation for your taste buds, and the best part is, they’re incredibly easy to make.
Why You’ll Love This Recipe
These Pineapple Bars are a must-try for several reasons. First, they bring a burst of sunshine to your dessert table with their vibrant pineapple flavor. The combination of the buttery crust and the coconut drizzle creates a heavenly texture contrast that is simply irresistible. Plus, they’re versatile; you can tweak the recipe to suit your taste by adding a dash of cinnamon or swapping out water for pineapple juice.
Kitchen Equipment You’ll Need
- 9×13 glass baking dish
- Mixing bowl
- Whisk
- Fork for drizzling
Ingredients
Crust and Topping
- 1½ cups all-purpose flour
- ½ cup sugar
- Pinch of salt
- 1½ sticks cold butter (cubed)
Filling
- 2 eggs
- 1 cup sugar
- ⅓ cup all-purpose flour
- ½ cup sour cream
- Pinch of salt
- 1 16 oz can crushed pineapple – drained
Coconut Drizzle
- 1 cup confectioners sugar
- 2 tablespoons half and half
- 1 teaspoon coconut extract
Step-by-Step Instructions
- Preheat your oven to 350 degrees and spray a 9×13 glass baking dish with non-stick spray.
- In a mixing bowl, combine flour, sugar, salt, and cubed butter. Beat until the mixture is crumbly.
- Set aside 1 cup of the topping mixture. Press the remaining mixture firmly into the baking dish to form the crust. Bake for 15 minutes.
- While the crust is baking, whisk the eggs in a large bowl. Add sugar, sour cream, flour, and salt, mixing well.
- Gently fold in the drained pineapple.
- Once the crust is ready, remove it from the oven and carefully spoon the pineapple filling over it. Sprinkle with the reserved crust mixture.
- Bake for another hour or until the top is lightly browned.
- Cool for 15 minutes before drizzling the glaze over the bars using a fork.
Tips for Success
- Ensure the butter is cold when combining with the other crust ingredients for a perfect crumbly texture.
- Drain the pineapple well to prevent the bars from becoming too soggy.
- Allow the bars to cool slightly before drizzling the glaze for a neat finish.
Additional Tips and Variations
Feel free to experiment with flavors by adding a tablespoon of lemon juice to the filling or using vanilla in the crust. You can also substitute margarine for a slightly different texture or add a pinch of cinnamon for a warm spice kick.
Nutritional Highlights (Per Serving)
While the exact nutritional content will vary based on portion size, these bars are a delightful treat with a balance of carbohydrates, fats, and sugars. Perfect for an occasional indulgence!
Frequently Asked Questions (FAQ)
Can I use fresh pineapple instead of canned? Absolutely! Just make sure to chop it finely and use the juice sparingly.
How should I store these bars? Keep them in an airtight container in the refrigerator for up to a week.
Can I make these bars gluten-free? Yes, substitute the all-purpose flour with a gluten-free flour blend.
Conclusion
These Pineapple Bars are a delightful way to enjoy a tropical treat any time of the year. Give this recipe a try, and let your kitchen be filled with the warm, inviting aroma of pineapple and coconut. We’d love to hear how they turn out for you, so feel free to share your experience and any creative twists you tried!

