Apple Crisp
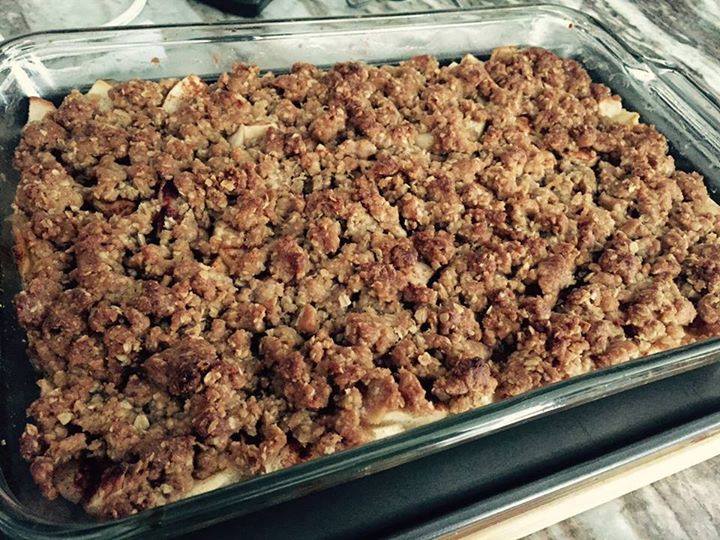
This easy apple crisp is made the old-fashioned way, just like Grandma used to make. It’s perfect with a scoop of vanilla ice cream and a drizzle of salted caramel sauce! A true classic fall dessert, this apple crisp recipe is reminiscent of generations past. Pop this apple crisp in the oven and wait for the delicious smell to waft through your house!
Why You’ll Love This Recipe
Do you have a classic fall dessert that you just LOVE? I have several, but one of them is definitely this apple crisp recipe! Growing up, my mom had two classic desserts that she always made: her famous carrot cake and a mouthwatering apple crisp. This isn’t her exact recipe, but it’s one that I’ve tweaked and perfected over time. While I do love pumpkin, apple is actually my favorite fall flavor—mostly because of this crisp!
Some apple crisp recipes don’t use oats, which is totally fine if that’s your preference. However, I LOVE the crispy oat topping, so I made sure to add a good amount of it. It’s 100% up to you whether to peel the apples. Generally, when I make this easy apple crisp, I’m making it for my family, and my kids wouldn’t eat it with the skins on, so I peel them more often than not. If you choose to leave the skins on, be sure to wash the apples thoroughly.
Kitchen Equipment You’ll Need
- 9-inch deep dish pie plate or 8 x 8 x 2-inch baking dish
- Food processor (or two knives/your fingertips)
- Large bowl
- Wire rack
Ingredients
Topping:
- 1/2 cup (65 grams) all-purpose flour
- 1/4 cup (50 grams) granulated white sugar
- 1/4 cup (55 grams) light brown sugar
- 1/2 teaspoon ground cinnamon
- 1/4 teaspoon fresh or ground nutmeg (optional)
- 1/8 teaspoon salt
- 6 tablespoons (84 grams) cold unsalted butter, cut into pieces
- 1/3 cup (30 grams) old-fashioned rolled oats
- 1/3 cup (40 grams) chopped walnuts or pecans
Filling:
- 6 cups (1.2L) Granny Smith apples or other firm, tart-tasting apples (peeled, cored, and cut into 1-inch chunks)
- 1 cup (240 ml) fresh blackberries or raspberries (optional)
- Juice of 1/2 lemon
- 1 teaspoon lemon zest
- 3 tablespoons (40 grams) white granulated sugar
Step-by-Step Instructions
- Preheat your oven to 375 degrees F (190 degrees C) and place a rack in the center. Butter or spray a 9-inch deep dish pie plate or an 8 x 8 x 2-inch baking dish with non-stick cooking spray. You can also use eight individual ramekins.
- Topping: Place all the topping ingredients (flour, sugars, spices, butter, oats, and nuts) in a food processor and process until the mixture is crumbly and no large pieces of butter are visible. Alternatively, use two knives or your fingertips. Set aside.
- Filling: In a large bowl, combine apple chunks, berries (if using), lemon zest, lemon juice, and sugar. Toss to mix well. Transfer the mixture to your prepared baking dish and spread the topping evenly over the apples.
- Bake for approximately 30-40 minutes (20-25 minutes for individual ramekins) or until bubbly and the topping is golden brown. The apples should be tender but not mushy when pierced with a knife.
- Remove from the oven and let cool on a wire rack for about 30 minutes before serving.
- Serve with softly whipped cream or vanilla ice cream. Refrigerate leftovers and reheat before serving.
Makes 4 – 6 servings.
Tips for Success
- Ensure your butter is cold when making the topping; this helps achieve a crumbly texture.
- If you prefer a less sweet dessert, reduce the amount of sugar in the filling.
- Experiment with different apple varieties for unique flavor profiles.
Additional Tips and Variations
- Add a pinch of cloves or allspice for a spicier flavor.
- Substitute pecans with almonds or hazelnuts for a different nutty twist.
- For a gluten-free version, use almond flour instead of all-purpose flour.
Nutritional Highlights (Per Serving)
Calories: 320 | Carbs: 45g | Protein: 3g | Fat: 15g | Fiber: 5g
Frequently Asked Questions (FAQ)
Can I make this recipe in advance?
Yes, you can prepare the crisp and store it in the refrigerator for up to 24 hours before baking. You can also bake it in advance and reheat it before serving.
Can I freeze apple crisp?
Absolutely! Freeze the baked crisp for up to 3 months. Reheat in the oven at 350 degrees F until warmed through.
What’s the best way to store leftovers?
Store leftovers in an airtight container in the refrigerator for up to 3 days.
Conclusion
I hope you’re as excited to try this delicious apple crisp as I am to share it with you! It’s the perfect dessert to enjoy during the cozy fall months, and it’s sure to become a family favorite. If you give this recipe a go, please leave a comment below and let me know how it turned out. I’d love to hear about your experience and any variations you tried. Happy baking!


