Nanny’s Date Squares
Introduction
There is a method to my madness in this space, and it’s this: Life in Pleasantville is and always will be a record of my time here for my daughters. Yes, I write with you in mind, but ultimately, this is where I hope my children will come to find that favorite recipe I used to make them, or find one of my Mom’s best recipes, or look up a vacation memory. I hope that one day they’ll add to this online journal for their own children. Pretty deep for sharing my mom’s Best Date Squares recipe, isn’t it? But food has that power over us, doesn’t it? To evoke strong emotions and bring back a flood of memories.
Part of being a Life Made Delicious ambassador means I get to share some of the very best recipes that make it so. My mom’s date squares, much like her butter tarts, are one of those recipes that makes me think of her and all the love she poured into the kitchen every day. I wonder what recipes my children will feel that way about? Maybe someday they’ll tell us right here in Pleasantville.
Why You’ll Love This Recipe
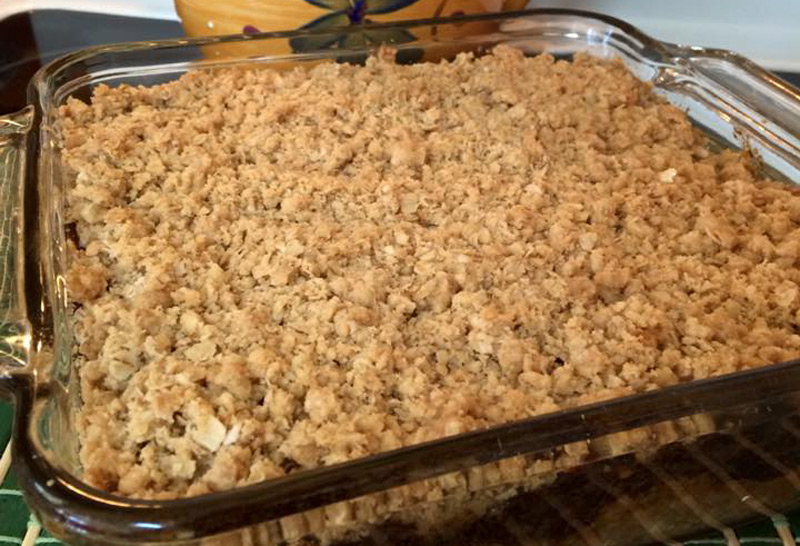
Nanny’s Date Squares are the perfect blend of sweet and savory, with a crumbly oat topping and a rich, fruity filling. They are simple to make and offer a delightful treat that everyone will enjoy, whether for dessert or a mid-afternoon snack. Plus, they carry the nostalgia of family traditions and homemade goodness.
Kitchen Equipment You’ll Need
- 9″ square baking pan
- Mixing bowls
- Small saucepan
- Spatula
- Oven
- Measuring cups and spoons
Ingredients
Crumb Mixture
- 1 1/2 cups all-purpose flour
- 1/2 tsp baking soda
- 1 tsp baking powder
- 1/4 tsp salt
- 1 cup butter
- 1 cup brown sugar
- 1 1/2 cups rolled oats
Date Filling
- 2 cups chopped dates
- 3/4 cup cold water
- 2 tbsps brown sugar
- Grated rind of 1/2 orange (optional)
- 2 tbsps orange juice (optional)
- 1 tsp lemon juice
Instructions
- Preheat your oven to 325°F (163°C).
- In a mixing bowl, combine flour, baking powder, baking soda, and salt.
- Rub or cut in the butter until the mixture is crumbly.
- Add the brown sugar and rolled oats to the mixture and mix well.
- Spread half of the crumb mixture in a greased, shallow 9″ square pan. Pat the mixture until firm and smooth.
- In a small saucepan, cook the dates, water, orange rind, and brown sugar over medium heat until thick and smooth.
- Remove from heat and add orange juice if using, then mix well.
- Spread the date mixture over the crumbs in the bottom of the pan.
- Sprinkle the remaining crumb mixture on top.
- Bake for 35-40 minutes until lightly browned.
- Cut the squares while hot and allow them to cool in the pan.
Tips for Success
- Ensure the butter is cold for a crumbly texture in the crust.
- Press the base firmly into the pan to create a solid foundation for the date filling.
- Let the bars cool completely before removing them from the pan to avoid breaking them.
Additional Tips and Variations
For an extra zing, consider adding a teaspoon of vanilla extract to the date filling. If you prefer a nuttier flavor, sprinkle some chopped walnuts or pecans into the crumb mixture before baking.
Nutritional Highlights (Per Serving)
These date squares are a good source of fiber and contain essential vitamins and minerals from the dates and oats. However, they are also quite rich in sugar and butter, so enjoy them in moderation!
Frequently Asked Questions (FAQ)
Can I use fresh dates instead of dried?
Yes, you can use fresh dates, but you may need to adjust the water content as fresh dates have higher moisture.
How should I store these date squares?
Store them in an airtight container at room temperature for up to a week, or freeze them for longer storage.
Can I make these date squares gluten-free?
Yes, simply substitute the all-purpose flour with a gluten-free flour blend and ensure your oats are certified gluten-free.
Conclusion
I hope you enjoy making and indulging in Nanny’s Best Date Squares as much as our family has over the years. They are not just a treat but a wonderful way to create cherished family memories. If you try the recipe, I’d love to hear about your experience in the comments below. Happy baking!


