Gluten-Free Pie Crust
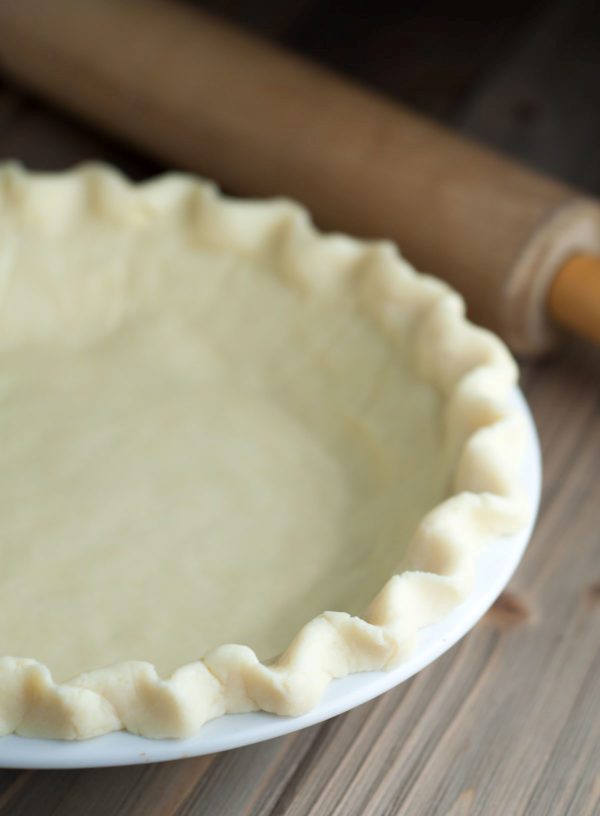
If you follow a gluten-free diet and cook your own food, then you know that gluten-free baking is quite tricky. Gluten serves as a sort of binder in regular baked goods, so without gluten to hold your dough together, you’ll have to be creative about your gluten-free baking. But here’s one gluten-free pie crust recipe you will surely be happy to use. The recipe works well and you won’t compromise your diet at all.
The beauty of this gluten-free pie crust is it has great texture. It’s soft enough to slide onto a pie plate, but not so delicate that it won’t easily crumble when pulled or pressed. It also tastes good enough to use on any kind of pie, whether it is the sweet or savory type.
Why You’ll Love This Recipe
This gluten-free pie crust is a game changer for anyone who loves pies but needs to avoid gluten. The texture is just right—flaky, yet sturdy enough to hold your favorite fillings. Plus, it’s versatile enough to complement both sweet and savory pies.
Kitchen Equipment You’ll Need
- Large mixing bowl
- Box grater
- Rolling pin
- Parchment paper
- Pie plate
- Aluminum foil
- Dried beans or ceramic pie weights
Ingredients
- 2 cups King Arthur Flour (KAF) brand Gluten-Free All Purpose Flour Mix*
- ½ tsp salt
- 8 tbsp unsalted butter, well chilled
- 1 large egg, lightly beaten
- 8 to 10 tbsp iced water
Instructions
- Measure the KAF brand Gluten-Free All Purpose Flour Mix into a large bowl. Whisk the salt into the gluten-free flour.
- Make a well in the center of the mix. Using a box grater positioned over the well, grate the chilled butter into it.
- Gently toss the shredded butter into the flour mix until it is evenly distributed.
- Add the beaten egg to the center, gently working it in with your fingers until the mixture is crumbly.
- Add the iced water one tablespoon at a time, working it in by hand until a moist, crumbly dough forms.
- Shape the dough into a large ball. Cut the ball in half and place each half onto a sheet of parchment paper sprinkled with additional gluten-free flour mix.
- Form each half of dough into a smooth disk. Sprinkle a small amount of flour over each disk, cover with another sheet of parchment paper.
- Roll each disk between the parchment paper until it is 2 inches larger than the pie plate.
- Carefully peel off the top layer of parchment. Center it over the pie plate and flip it over into the plate. Remove the bottom layer of parchment.
- If the crust breaks apart in spots, pinch the dough back together.
For a Double Crust Pie
Fill the bottom crust with the desired filling. Flip the second crust over the filling, crimp the edges, vent the top crust, and bake as directed by your pie recipe.
For a Single Crust Pie
Crimp the edges as desired, fill the crust, and bake as directed by your pie recipe.
To Blind Bake a Single Crust
- Crimp the edges as desired and freeze the crust in the pie plate for at least 30 minutes, preferably overnight.
- Preheat the oven to 425°F.
- Line the frozen crust with a double thickness of aluminum foil. Fill with dried beans or pie weights.
- Bake for 12 minutes, remove the foil and weights, and continue baking for another 2 to 3 minutes until the crust begins to brown.
- Allow the crust to cool completely before filling.
To Par-Bake a Single Crust
- Crimp the edges as desired and freeze the crust in the pie plate for at least 30 minutes, preferably overnight.
- Preheat the oven to 425°F.
- Line the frozen crust with a double thickness of aluminum foil. Fill with dried beans or pie weights.
- Bake for 5 or 6 minutes until the crust begins to set but is not brown.
- Remove the foil and weights, fill the pie, and continue baking as directed by the recipe.
Tips for Success
- Ensure your butter is well chilled before grating for a flakier crust.
- Work quickly to keep the dough cold, which helps maintain its texture.
Additional Tips and Variations
- Add a teaspoon of sugar for a sweeter crust, ideal for fruit pies.
- Incorporate herbs like thyme or rosemary for a savory pie crust.
Nutritional Highlights (Per Serving)
Calories: 200, Fat: 12g, Carbohydrates: 22g, Protein: 3g
Frequently Asked Questions (FAQ)
Can I make this crust ahead of time? Yes, you can prepare the dough in advance and refrigerate it for up to two days or freeze it for longer storage.
What if I don’t have a box grater? You can cut the butter into small cubes and use a pastry cutter or fork to mix it into the flour.
Is there a vegan version of this crust? You can substitute the butter with a vegan butter alternative and the egg with a flax egg (1 tbsp flaxseed meal + 2.5 tbsp water).
Conclusion
This gluten-free pie crust is a versatile and delicious foundation for your pie-making adventures. We hope you enjoy crafting your creations with this recipe. Give it a try and let us know how it turns out. Share your experiences and any creative variations you try!


