Homemade Caramel
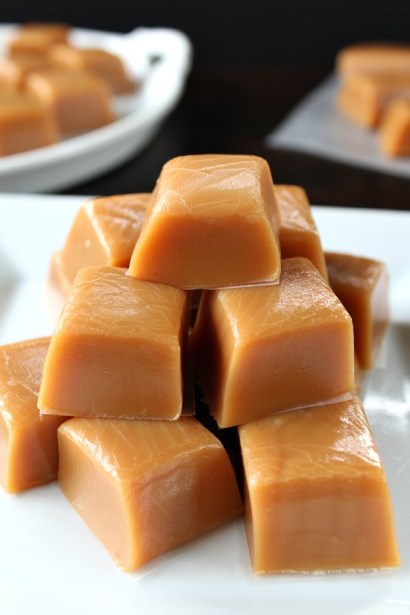
This homemade caramel is super delish! When was the last time you made some homemade caramel? This treat is not only irresistibly tasty but also surprisingly simple to prepare. This is my go-to recipe for delicious caramel. With the holiday season just around the corner, it’s the perfect time to add this to your collection. Keep this recipe handy and start a new family tradition, just like we have. You can enhance it with chopped pecans, walnuts, chocolate chunks, or simply enjoy it on its own. For us, this is the ultimate caramel recipe, a cherished family tradition that brings soft, creamy, and delightful caramel to our holiday gatherings.
Why You’ll Love This Recipe
This homemade caramel is a must-try for anyone who loves rich, buttery flavors. It’s versatile, allowing you to customize with your favorite add-ins or enjoy in its classic form. Plus, it’s a wonderful way to create lasting memories with loved ones during the holiday season.
Kitchen Equipment You’ll Need
- Heavy-bottomed pan
- Wooden spoon or spatula
- Candy thermometer
- 9 x 13 or 8 x 8 glass baking dish
- Wax paper
- Long buttered spatula
Ingredients
- 1 cup butter
- 1 16 oz box of light brown sugar
- Dash of salt
- 1 cup light corn syrup
- 1 14 oz can sweetened condensed milk
- 1 tsp vanilla
Step-by-Step Instructions
- In a heavy-bottomed pan, melt the butter over low heat.
- Once melted, add the brown sugar and a dash of salt. Stir thoroughly.
- Add the corn syrup and continue to stir.
- Slowly incorporate the condensed milk, stirring constantly.
- Cook over low heat, maintaining constant stirring.
- When the caramel begins to boil, continue cooking until it reaches 230°F, testing for the “soft ball” stage, which takes about 16-18 minutes.
- To test, drop a small amount into cold water; it should feel soft but firm. Adjust cooking time as needed.
- Once the caramel reaches the right consistency and temperature, remove from heat.
- Stir in the vanilla.
- Pour the caramel into a generously buttered 9 x 13 glass baking dish.
- Allow the caramel to cool before removing it from the baking dish.
- Place caramel on wax paper, using a buttered spatula to prevent sticking.
- Cut into bite-sized pieces.
- Wrap each piece in wax paper, twisting the ends, or store in a container with wax paper between layers.
Tips for Success
- Constant stirring is crucial to prevent the caramel from burning.
- Use a candy thermometer to accurately measure the caramel’s temperature.
- Be patient during the cooking process; rushing can lead to undesirable textures.
Additional Tips or Variations
Try adding a pinch of sea salt for a salted caramel twist, or mix in some chopped nuts or chocolate for added texture and flavor. For a festive touch, drizzle with melted chocolate once cooled.
Nutritional Highlights (Per Serving)
Note: Nutritional values can vary based on portion size and any additional ingredients added.
Frequently Asked Questions (FAQ)
Q: How should I store the caramel?
A: Store wrapped caramel at room temperature in an airtight container to keep them fresh.
Q: Can I use dark brown sugar instead?
A: Yes, dark brown sugar will give the caramel a richer flavor, though it may slightly alter the sweetness.
Q: What if I don’t have a candy thermometer?
A: You can use the “soft ball” test described in the instructions to determine the right consistency.
Conclusion
This homemade caramel is a delightful treat that’s perfect for any occasion, especially the holidays. It’s easy to make and offers a rich, creamy texture that everyone will love. Give this recipe a try and share your results with friends and family. We’d love to hear about your experiences and any creative variations you come up with!

