French Silk Slab Pie
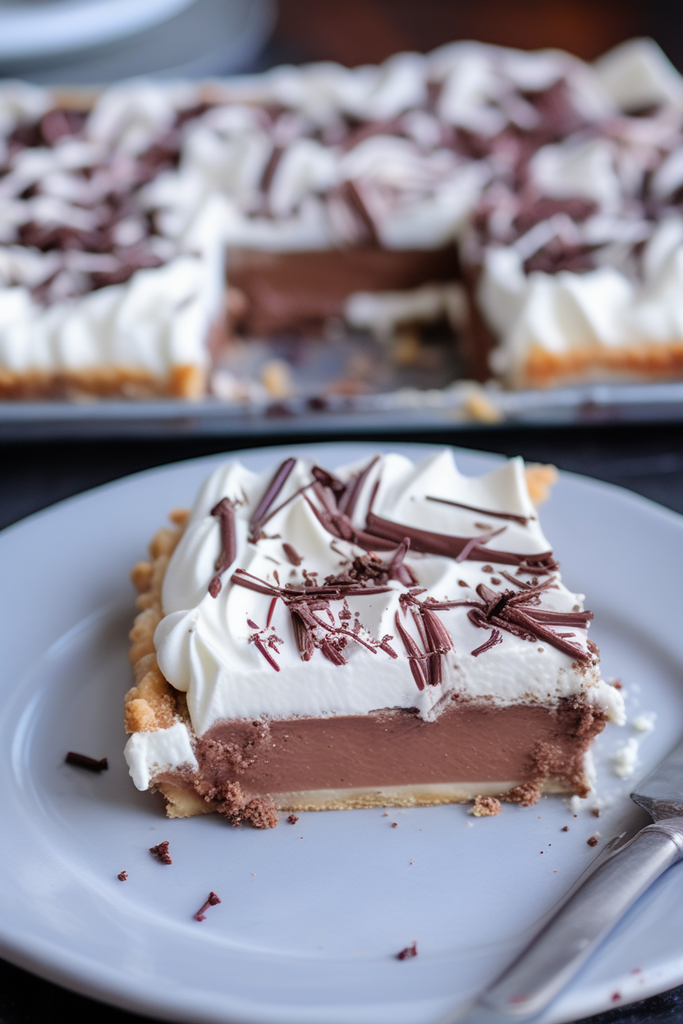
I’ve often seen people dig into a slice of French Silk Pie, savoring the creamy filling but leaving the crust behind. Not me! I believe a pie’s crust is just as important as its filling, and that’s why I adore French Silk Slab Pie. This delightful dessert offers the perfect balance of rich, chocolatey filling and crispy crust, ensuring every bite is a harmonious blend of textures. Plus, it’s large enough to share—or keep all to yourself!
Why You’ll Love This Recipe
This French Silk Slab Pie is a chocolate lover’s dream. It’s perfect for gatherings, as it can easily feed a crowd. The slab pie format means a higher crust-to-filling ratio, so if you’re a fan of crust like me, this is the pie for you. Whether you make your own crust or use a store-bought one, you’re in for a treat.
Kitchen Equipment You’ll Need
- Half sheet pan (about 13×18 inches)
- Rolling pin
- Mixing bowls
- Electric mixer
- Microwave-safe container
- Medium saucepan
- Parchment paper
- Pie weights or dried beans
Ingredients
For the Crust:
- 2 9-inch pie crusts, softened
For the Filling:
- 10 oz bittersweet chocolate, plus more for topping
- 4 eggs
- 1 1/3 cups granulated sugar
- 2 teaspoons vanilla extract
- 1/2 cup (1 stick) unsalted butter, softened
- 2 1/2 cups heavy whipping cream
- 1/3 cup powdered sugar
Step-by-step Instructions
- Preheat your oven to 350°F and grease a half sheet pan with nonstick spray. Set aside.
- On a lightly floured surface, stack the pie crusts on top of each other and roll out into a rectangle slightly larger than your baking pan. Place the crust in the pan, pressing into the corners, trim the excess dough, and crimp the edges.
- Line the crust with parchment paper and fill with pie weights or dried beans. Bake until slightly golden, about 15-17 minutes. Remove from the oven and let cool completely before filling.
- In a microwave-safe container, melt the chocolate in 30-second increments, stirring in between, until nearly melted. Stir until completely melted and set aside.
- In a medium saucepan, whisk together the sugar and eggs. Reduce heat to low, and stirring constantly, heat until the sugar has dissolved and the mixture coats the back of a spoon, about 5 minutes.
- Remove from heat and stir in the melted chocolate and vanilla extract until smooth. Let cool until warm, stirring occasionally.
- While the chocolate cools, add butter to a mixing bowl and beat until light and fluffy, 2-3 minutes. Gradually pour in the chocolate mixture, then beat on high until light and fluffy, about 5 minutes. Set aside.
- In a separate bowl, beat the heavy cream with an electric mixer until it starts to thicken. Add powdered sugar and continue beating until stiff peaks form.
- Fold 1 1/2 cups of the whipped cream into the chocolate mixture and reserve the rest for topping.
- Spread the chocolate mixture into the cooled pie crust and chill until set, 1-2 hours. Top with remaining whipped cream and garnish with chocolate shavings, if desired, before serving. Enjoy!
Tips for Success
- Ensure the crust is fully cooled before adding the filling to prevent it from becoming soggy.
- When melting the chocolate, be careful not to overheat it to avoid burning.
- For a fluffier filling, make sure the butter and chocolate mixture is well-incorporated and airy.
Additional Tips and Variations
For a twist, consider adding a teaspoon of espresso powder to the filling for a mocha flavor. Or, sprinkle some sea salt on top of the pie for a salty-sweet contrast.
Nutritional Highlights (Per Serving)
This rich dessert is indulgent, so enjoy it as a special treat! Each serving provides a delightful balance of creamy chocolate and buttery crust.
Frequently Asked Questions (FAQ)
Can I use milk chocolate instead of bittersweet chocolate?
Yes, but keep in mind that milk chocolate will result in a sweeter pie. Adjust the sugar to taste if necessary.
How long can I store the pie?
You can store the pie in the refrigerator for up to 3 days, though it’s best enjoyed fresh.
Can I freeze this pie?
Freezing is not recommended as it may alter the texture of the filling.
Conclusion
I hope you try making this French Silk Slab Pie and enjoy every luscious bite as much as I do. It’s a delightful dessert that brings together the best of crust and filling in every slice. Share your pie-making adventures in the comments below—I’d love to hear how it turned out for you!


