Chicken Pot Pie
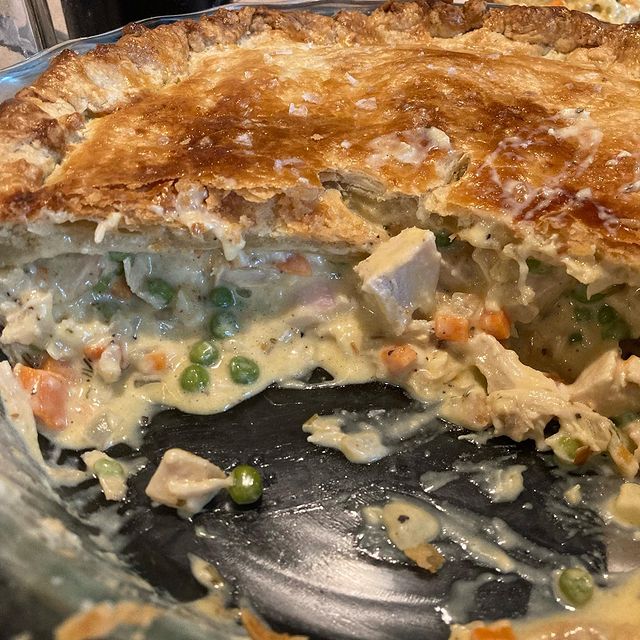
There’s nothing quite like the comforting aroma of a freshly baked Chicken Pot Pie wafting through your kitchen. This classic dish, with its rich and creamy filling encased in a golden, flaky crust, is the perfect way to warm up on a chilly day. Whether you’re making it from scratch or using a few shortcuts, this recipe is sure to become a family favorite.
Why You’ll Love This Recipe
This Chicken Pot Pie is the ultimate comfort food. The homemade crust adds an extra layer of deliciousness, but if you’re pressed for time, a store-bought crust will do the trick too. The creamy filling, packed with tender chicken and a medley of vegetables, is sure to satisfy even the pickiest eaters. Plus, it’s a versatile dish that you can prepare ahead of time for busy nights.
Kitchen Equipment You’ll Need
- Large skillet
- Wooden spoon
- Measuring cups and spoons
- 2-quart casserole dish
- Oven
Ingredients
- 1 cup potato, diced
- 1 cup onion, diced
- 1 cup celery, diced
- 1 cup carrot, diced
- 1/3 cup melted margarine
- 1/2 cup all-purpose flour
- 2 cups chicken broth
- 1 cup half-and-half
- 1 teaspoon salt
- 1/4 teaspoon pepper
- 4 cups chicken, cooked and chopped
- 2 pie crusts (either store-bought or homemade)
Step-by-Step Instructions
- Preheat your oven to 400°F (200°C).
- In a large skillet, sauté the onion, celery, carrots, and potatoes in melted margarine for about 10 minutes.
- Add the flour to the sautéed mixture, stirring well, and cook for one minute while stirring constantly.
- Combine the chicken broth and half-and-half, then gradually stir this mixture into the vegetable mixture.
- Cook over medium heat, stirring constantly until the mixture is thickened and bubbly.
- Stir in the salt and pepper, then add the chicken and mix well.
- Pour the filling into a shallow 2-quart casserole dish and top with the pie crusts.
- Bake for 30-40 minutes, or until the crust is golden and flaky.
Tips for Success
To prevent a soggy bottom crust, ensure your filling isn’t too liquidy. It should be thick when you remove it from the stove. Using rotisserie chicken can save you time and adds a depth of flavor to your pot pie.
Additional Tips and Variations
If you like, you can add other vegetables such as peas or corn to the filling. For a lighter version, substitute the half-and-half with milk. You can also spice it up with herbs like thyme or rosemary for extra flavor.
Nutritional Highlights (Per Serving)
Calories: Approximately 450
Protein: 25g
Fat: 20g
Carbohydrates: 45g
Fiber: 4g
Sugars: 6g
Frequently Asked Questions (FAQ)
What is chicken pot pie?
It’s a savory pie filled with cooked chicken, onion, carrot, and peas in a creamy sauce.
Do you have to make your own pie crust?
Heck no! We opt to because the only thing better than your same ol’ chicken pot pie is chicken pot pie with a buttery, flaky homemade crust, but store-bought pie crust is a super helpful hack when you don’t want to spend time making a crust from scratch.
How do you make sure your bottom crust doesn’t get soggy?
This all depends on not having a soupy chicken filling. The filling should be thick when it comes off the stove; too much chicken broth and you’ll run the risk of it seeping through your crust before it’s baked.
Can you make chicken pot pie ahead of time?
Absolutely! You can make the filling up to a day in advance and you can freeze a whole unbaked chicken pot pie for up to two months.
Can I use rotisserie chicken?
Yup! We love turning to rotisserie chicken for a shortcut any night. This chicken pot pie uses rotisserie chicken in the smartest way.
How long does chicken pot pie last?
Freshly baked, chicken pot pie will last up to 5 days in the refrigerator. Cover with aluminum foil or store in a resealable container.
Conclusion
Now that you have this irresistible Chicken Pot Pie recipe at your fingertips, it’s time to roll up your sleeves and get cooking. Whether you stick to the classic version or add your own twist, this dish is sure to become a staple in your home. Don’t forget to share your cooking experiences and any variations you try in the comments below. Happy cooking!
Source: allrecipes.com

