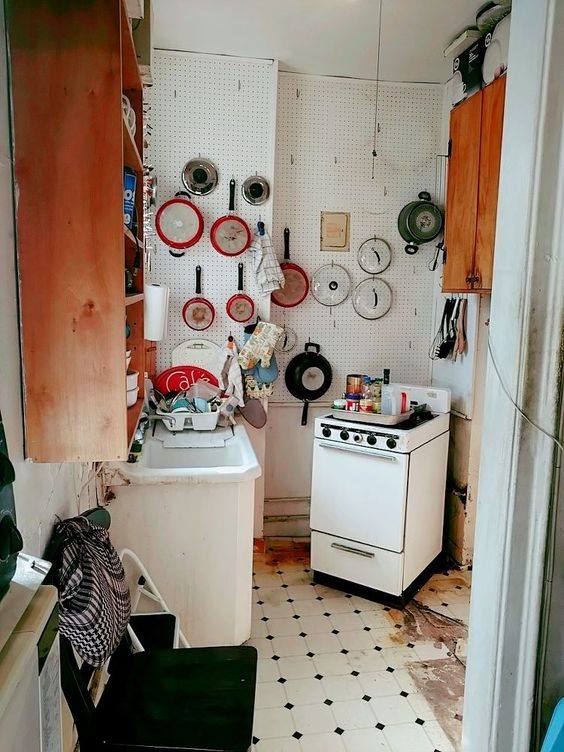
Once everything was out of the area, we went to work painting everything WHITE. The room seemed so much bigger with everything out and the new coat of paint. The wooden cabinetry was still in good shape so we painted it white inside and out and kept the black hinges. Replaced the wooden knobs with black ones to match the hinges.
I added more storage by extending shelving around the window and over the sink to give a place for coffee maker, toaster oven to live instead of on the counter to give us more space. Designed it myself and went to the local hardware store and had it cut to size. A day worker recommended by our super helped me with the handywork.
The counter cabinet that you will see in a later pic was also painted white and we added a board at the back to act as a back splash. Makes it look more finished and stopped items dropping behind it.

The linoleum arrived next, so I had to move everything from our hallway into the living room as well! Don’t you really appreciate having a house, garage and back yard for storage during a renovation? Not in a city apartment. Learned to just make due and it is all worth it in the end.

They had to remove the old linoleum, and the old old linoleum underneath that to level the floor before the new linoleum could be installed.

One side on it’s way. Coffee maker has a home on the window sill and toaster oven is now on a new shelf on the wall over the sink. Saved the silverware racks from the old dishwasher on the wall for extra space. Still have some electrical wiring issues to handle so cords are not visible. Flowers add more color while we wait for the new appliances to arrive.

New Stove and Dishwasher. Stove is the same size as the old one, but it has a top broiler, a light inside the oven and no more pilot light – electric ignition. The dishwasher is smaller than we had before, which gives us a small space between for added storage. I will build a full counter and slide out storage in that area at a later date.

White Pine Shelving installed over the window gave us added storage and places to have plants, etc. It is so pretty with the sun shining in through the leaves.

Another angle of the window next to the shelf on the wall and the breakfast nook area in the back.

A look at the full kitchen face lift. I added more items since this picture, baskets on the wall, etc. It is still busy, but it reflects our lives in the city. We are busy people with full calendars, and more room in our kitchen now gives us space to prepare our meals. We still bump into each other when we are both in the one person galley, but there is more room to bump.
Counterspace…. a city luxury.

And our breakfast nook with paintings from my Father in Law hanging on our wall. I am ready for a cup of coffee to share with my husband, now that we are all put back together. (No, not everything found a home in our new kitchen, some things were tossed, some given away, some are still waiting for a new home. And no, you can’t see my living room yet…. that reno is next.)
Thanks for taking the time. I love my new Kitchen Face Lift.
Materials I used for this project:
- Pine boards (Ace Hardware)
- Appliances (P C Richards)
- Linoleum (Local merchant)
- New Black Hardware (Ace Hardware)
- White Paint (Ace Hardware)

