How to Use Stair Caps to Update Your Stairs
![](/wp-content/uploads/2023/01/How-to-Use-Stair-Caps-to-Update-Your-Stairs.jpg)
![how to use stair caps to update your stairs](https://cdn-fastly.hometalk.com/media/2020/10/29/6403890/how-to-use-stair-caps-to-update-your-stairs.1.jpg?size=720x845&nocrop=1)
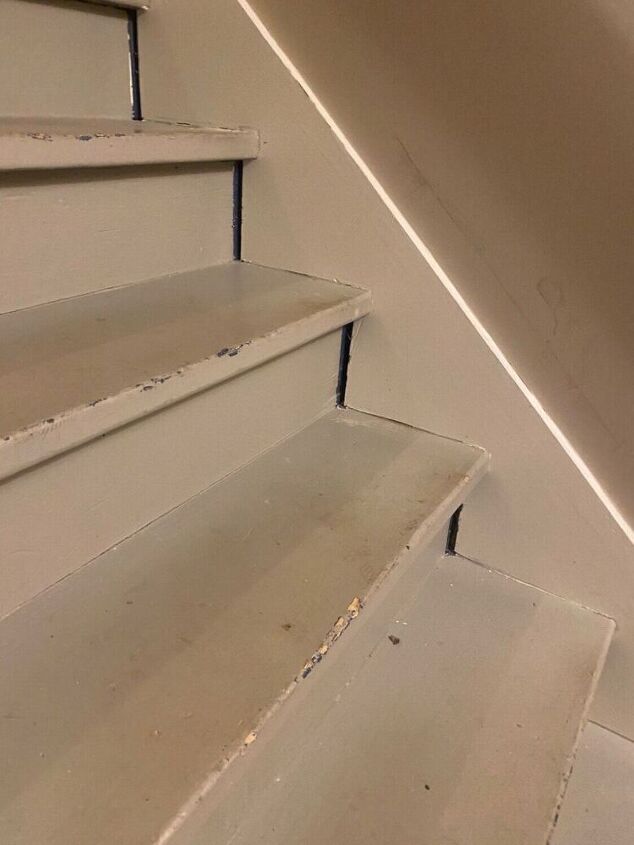
I bought one stair tread cap first, just to see if it would work. Then I ordered 11 more, bought the stain, a stain brush (on a whim), heavy duty adhesive and a finish nailer. I wanted to get Bostitch adhesive but it wasn’t in stock around me but my adhesive worked really well. Those treads aren’t going anywhere.
![how to use stair caps to update your stairs](https://cdn-fastly.hometalk.com/media/2020/10/29/6403897/how-to-use-stair-caps-to-update-your-stairs.jpg?size=720x845&nocrop=1)
I used a power miter box to cut down each tread about an inch for my stairs. On the first one it splintered a bit so I put masking tape on the top of the tread and that helped to keep it from splintering.
![how to use stair caps to update your stairs](https://cdn-fastly.hometalk.com/media/2020/10/29/6403900/how-to-use-stair-caps-to-update-your-stairs.1.jpg?size=720x845&nocrop=1)
I cut each tread upside down.
![how to use stair caps to update your stairs](https://cdn-fastly.hometalk.com/media/2020/10/29/6403902/how-to-use-stair-caps-to-update-your-stairs.1.jpg?size=720x845&nocrop=1)
As I cut each, I would dry fit in place. Be sure to tell family members not to use the stairs while you are doing this.
![how to use stair caps to update your stairs](https://cdn-fastly.hometalk.com/media/2020/10/29/6403904/how-to-use-stair-caps-to-update-your-stairs.jpg?size=720x845&nocrop=1)
Big improvement already…
![how to use stair caps to update your stairs](https://cdn-fastly.hometalk.com/media/2020/10/29/6403910/how-to-use-stair-caps-to-update-your-stairs.3.jpg?size=720x845&nocrop=1)
A lot of my stairs were slightly different lengths so after everything was dry fitted correctly, I numbered each tread. Oh, and make sure you draw a line under your six! I didn’t and then I was like 6 or 9… I figured it out but you should save yourself some heart ache.
![how to use stair caps to update your stairs](https://cdn-fastly.hometalk.com/media/2020/10/29/6403917/how-to-use-stair-caps-to-update-your-stairs.2.jpg?size=720x845&nocrop=1)
Since it was raining outside, I set up a staining/drying area in my basement.
![how to use stair caps to update your stairs](https://cdn-fastly.hometalk.com/media/2020/10/29/6403922/how-to-use-stair-caps-to-update-your-stairs.1.jpg?size=720x845&nocrop=1)
I’m so confident here, two minutes later
I had a tread Slip out of my hand and down the wall and had stain on my wall, arm, leg and clothes (that I was going to be very careful not to get stain on).
![how to use stair caps to update your stairs](https://cdn-fastly.hometalk.com/media/2020/10/29/6403942/how-to-use-stair-caps-to-update-your-stairs.jpg?size=720x845&nocrop=1)
Fun fact, coconut oil will remove stain from your skin, quickly and easily. I keep one in my craft room that is only used for non food activities.
![how to use stair caps to update your stairs](https://cdn-fastly.hometalk.com/media/2020/10/29/6403952/how-to-use-stair-caps-to-update-your-stairs.2.jpg?size=720x845&nocrop=1)
I really liked the brush. Normally, I used rags but the brush is nice.
![how to use stair caps to update your stairs](https://cdn-fastly.hometalk.com/media/2020/10/29/6403957/how-to-use-stair-caps-to-update-your-stairs.3.jpg?size=720x845&nocrop=1)
You will still need lots of rags to take off excess stain.
![how to use stair caps to update your stairs](https://cdn-fastly.hometalk.com/media/2020/10/29/6403960/how-to-use-stair-caps-to-update-your-stairs.1.jpg?size=720x845&nocrop=1)
Here is one with excess removed and one in the process of removing the excess.
![how to use stair caps to update your stairs](https://cdn-fastly.hometalk.com/media/2020/10/29/6403965/how-to-use-stair-caps-to-update-your-stairs.jpg?size=720x845&nocrop=1)
The brush was great for getting in the detail areas.
![how to use stair caps to update your stairs](https://cdn-fastly.hometalk.com/media/2020/10/29/6403969/how-to-use-stair-caps-to-update-your-stairs.jpg?size=720x845&nocrop=1)
I let them cure for 24 hours.
![how to use stair caps to update your stairs](https://cdn-fastly.hometalk.com/media/2020/10/29/6403970/how-to-use-stair-caps-to-update-your-stairs.jpg?size=720x845&nocrop=1)
Now to open my adhesive. Did you know you can cut the top off of your adhesives with most caulking guns? They have a hole in the handle. You just put it in to where you want the cut to be and squeeze the trigger/handle. So much easier than utility knives.
![how to use stair caps to update your stairs](https://cdn-fastly.hometalk.com/media/2020/10/29/6403972/how-to-use-stair-caps-to-update-your-stairs.2.jpg?size=720x845&nocrop=1)
I put a lot of adhesive down. I would put on some blobs and zigzag it around.
![how to use stair caps to update your stairs](https://cdn-fastly.hometalk.com/media/2020/10/29/6403974/how-to-use-stair-caps-to-update-your-stairs.2.jpg?size=720x845&nocrop=1)
I would place the tread on and the stomp all over it before using a finish nailer to secure it in place.
![how to use stair caps to update your stairs](https://cdn-fastly.hometalk.com/media/2020/10/30/6403977/how-to-use-stair-caps-to-update-your-stairs.2.jpg?size=720x845&nocrop=1)
I put three nails across the back and one on each side about an inch from the front nose.
![how to use stair caps to update your stairs](https://cdn-fastly.hometalk.com/media/2020/10/29/6403980/how-to-use-stair-caps-to-update-your-stairs.1.jpg?size=720x845&nocrop=1)
Going up!
![how to use stair caps to update your stairs](https://cdn-fastly.hometalk.com/media/2020/10/29/6403982/how-to-use-stair-caps-to-update-your-stairs.2.jpg?size=720x845&nocrop=1)
Looking better.
![how to use stair caps to update your stairs](https://cdn-fastly.hometalk.com/media/2020/10/29/6403983/how-to-use-stair-caps-to-update-your-stairs.1.jpg?size=720x845&nocrop=1)
And from the top down…
It was this picture that caused me to lose a whole night’s sleep. I had loved the stain color but didn’t realize from this vantage point, I have light floors on the main floor, dark stairs leading down to gray floors. This is something most buyers hate. I think I will end up putting a gray stain on top of my stairs after I consult our realtor. Our light colored floor will most likely be colored differently by the new owners because it is in rough condition.
![how to use stair caps to update your stairs](https://cdn-fastly.hometalk.com/media/2020/10/29/6403984/how-to-use-stair-caps-to-update-your-stairs.2.jpg?size=720x845&nocrop=1)
The risers were mdf thick enough to hide the holes and they went on much like the treads. I used a piece of cardboard under the riser to place each one on. I pulled it out after nailing in place.
![how to use stair caps to update your stairs](https://cdn-fastly.hometalk.com/media/2020/10/29/6403986/how-to-use-stair-caps-to-update-your-stairs.2.jpg?size=720x845&nocrop=1)
A couple of finish nails and some adhesive to hold each one in place.
![how to use stair caps to update your stairs](https://cdn-fastly.hometalk.com/media/2020/10/29/6403987/how-to-use-stair-caps-to-update-your-stairs.jpg?size=720x845&nocrop=1)
I think that this weekend project was well worth the time and money.
![how to use stair caps to update your stairs](https://cdn-fastly.hometalk.com/media/2020/10/30/6405085/how-to-use-stair-caps-to-update-your-stairs.jpg?size=720x845&nocrop=1)
This project gives some old stairs an amazing facelift. 10/10 Highly recommend!