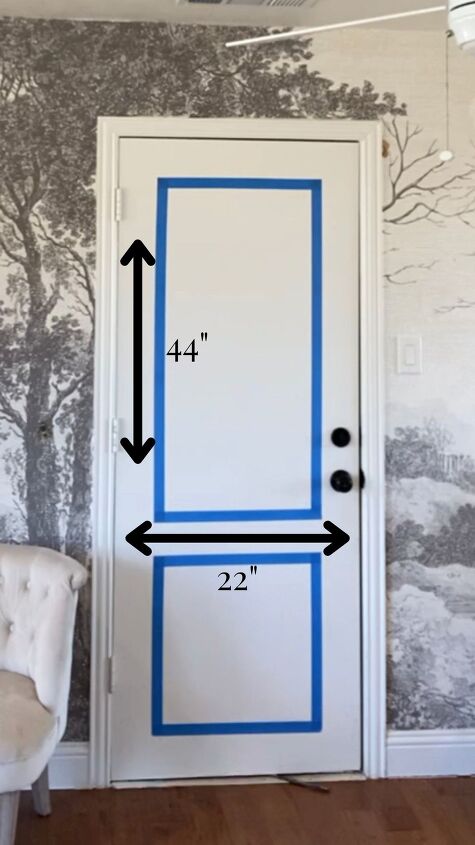
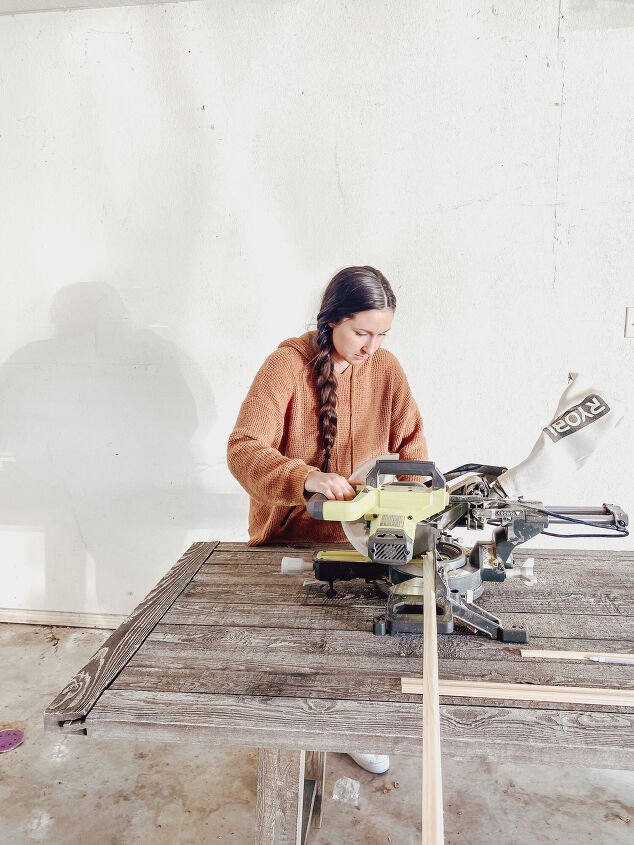
Step 2: Cut Trim PiecesOnce you’ve created your design it’s time to cut your trim pieces. I used my miter saw to cut them to the length they needed to be then mitered the edge to a 45degree angle. If power tools intimidate you this project is still something you can take on. Although I used a miter saw you can use a miter box which is very cost-effective and less intimidating. Both get the job done.
Step 3: Double-Check Your CutsI laid my pieces out on the ground in the layout that they would go on the door to make sure they would fit together perfectly. I was so pleased that mine worked on the first try!
Step 4: Install Trim to the DoorI used my brad nailer to attach the trim to the door. I’ve also seen this done with liquid nails where they tape the trim on the door while the adhesive is drying. Both options work!
I attached the top piece first then the first side, the second side, and lastly bottom. Don’t be worried if the mitered edges aren’t PERFECT. Caulk will make it look like a pro installed it.
Step 5: Caulk, Wood Putty & PaintI filled each nail hole with wood putty. You won’t have this step if you use liquid nails. Next, I caulked the edges. This immediately made it look so clean and professional.
I chose to paint the door Sherwin Williams Dorian Gray. I loved the color so much I’m going to paint all the doors in the playroom this color.
This project made such a huge impact! The door now looks as great as the wallpaper and the rest of the room.
I hope this project encourages you that even the most boring flat panel door has so much potential.