

My challenges were that I don’t know a ton about planting plants in the actual ground, just in planters.
The obvious was how to deal with insects and grub digging vermin. I thought I might be able to tackle one of the two by pouring a layer of cement on the bottom.
The only way to keep the dirt and grub diggers out is to cage it off. I prefer not to do that, so I may have to live with that.
I’m living with that problem now anyway, I often come out to the patio to see one of my succulents uprooted from its planter- but I’m working on something for that too (hint of a future project).
Again, keep in mind, this was written during the Stay At Home orders so I very much was limiting my trips and wanted to stick with materials I had on-hand.
I have some of the plants planted there only temporarily and plan to both add and change out a few plants, once our nursery opens again.
This is an easy project, but if your tree stump isn’t rotted, it will probably require a fair bit of elbow grease and some drilling and chopping to carve out the center.
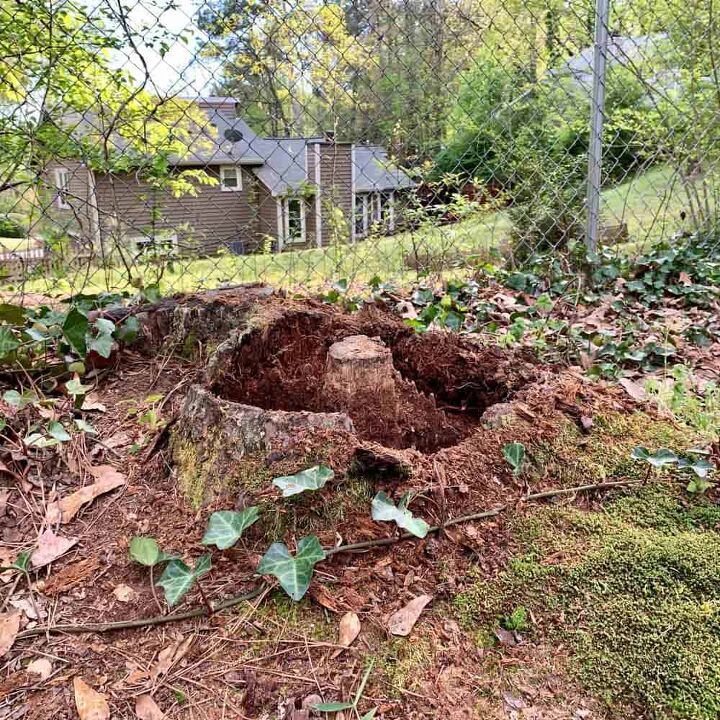
Step 1 | Hollow Out The Tree Stump
Trending videos

Like I mentioned in the intro, this part was a cinch for me since nearly the entire stump was rotted.
Assuming your stump is the same, put on some gardening gloves and use a trowel to dig out the rotted wood.
Then scoop out the dirt, powdered wood and bark from inside.
You may want to consider using a product like Diatomaceous Earth to keep the bugs at bay- but this may be overkill because the cement should keep most of them out.
**For another repurposed garden idea, check out my Cinder Block Planter wall.
Step 2 | Create Drainage For the Succulent Garden
Cut a large straw into 3 or 4 pieces and place them at the low points in the bottom of the hollowed stump. This will allow you to have drainage in the cement.
Step 3 | Prepare The Stump For The Cement
If I had landscape fabric on hand, I would have laid that down before pouring the cement and then cut holes so it fits over the straws.
The reason for this is because when you spread the cement, it will pick up a decent amount of what’s leftover in the hollowed stump and make it slightly bothersome to spread.
Fabric will eliminate that problem.
Since I didn’t have any landscape fabric, I ended up layering some sand in there instead, to act as a barrier above the rotted wood and also to help level out the bottom.
Step 4 | Mix And Cast The Cement

**If you love making concrete projects, then check out my Pocket Guide to Concrete Mixes! I tested 6 mixes and made a handy reference chart. It’s a FREE download. 😉
Mix the cement to the consistency of a thick milkshake. I poured some in the hole and then spread it around with my gloved hand.
As you spread, just scoop up more cement and build up the sides as you go. I ended up letting the first batch cure so that spreading would be easier.

Since my long-term plan was to put a fair amount of ground spreading succulents in the stump, I went ahead and covered the top edges of the stump with cement since I knew they would be obscured.
Let this cure for an hour.
Step 5 | Prepare The Garden Bed

Once the cement has cured, you can begin layering the garden materials for the mini succulent garden. Start by removing the drainage straws from the cement.

Next, add a layer of drainage pebbles.

The next layer is your soil. I didn’t have succulent soil so I used regular organic soil and mixed in perlite, as well as a few more rocks.

Step 6 | Create The Tree Stump Mini Succulent Garden
Clean up the area around the stump and then go ahead and add your succulents. Add some smooth black river stones, or decorate anyway you’d like.
