
Trending videos

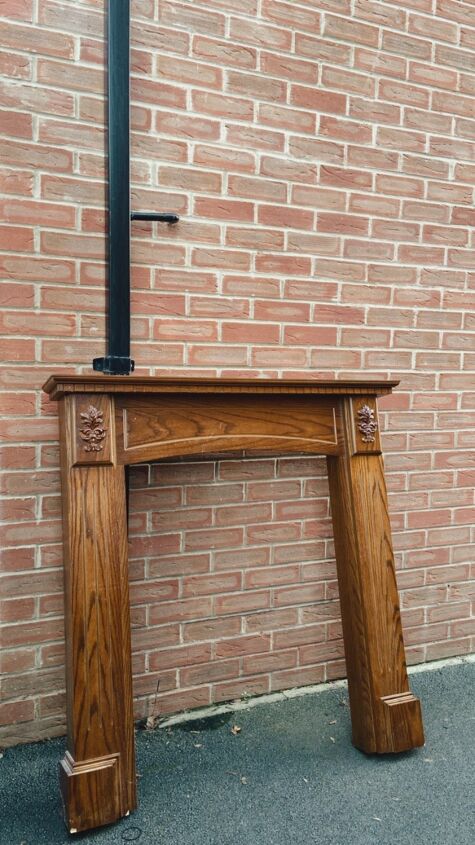
I lightly sanded the whole thing down and cleaned well prior to priming.

I applied two coats since the wood was quite dark and I have skipped two coats of primer before. I then regretted it as I just ended up using more coats of paint to get the desired coverage.

For this project I decided to try Fusion mineral paint. I’ve not been enjoying working with chalk paint lately as I’ve been finding it hard to get a good finish. I applied two coats and having tried this product now I have to say I love it! It’s non-toxic, virtually odourless and so hard wearing. I prepped and primed as usual but because the paint is so hard wearing it doesn’t require a topcoat to seal. Therefore this saves the whole step of waxing as would be done with chalk paint, which I have loved being able to eliminate from the process.

I found the perfect piece of wood to use to make a hearth. I could not believe the price of it in the shop as wood is still at a raised price. However it was the perfect size for this project and we did not have to adjust the size so I picked it up. This was an unfinished piece of wood therefore I just used one coat of primer followed by two coats of fusion mineral paint

My husband pulled away the skirting board so that the fire surround would sit right up against the wall. I was horrified when I first saw the mess from this as it was difficult to remove cleanly but it was a vital step in the process.

For behind the fire I decided to to use shiplap so that there wouldn’t just be a bare wall behind it. I saw this idea on Pinterest and wasn’t sure how it would look but I decided it was the best idea I could think of while keeping this project on a budget. We cut the pieces of shiplap to size to fit right inside the fire surround.

Again this wood was unfinished so I went ahead and applied a coat of Fusion mineral paint on each piece before we installed the shiplap.

In order for the hearth to sit up against the wall we had to either cut into the skirting board or the piece of wood. In order to keep this all movable for when we need to remove it while we update the floors hopefully at some point in the future, we cut into the piece of wood instead of the skirting board.

We laid everything out in place and measured where the cut needed to be made in the wood allowing for the shiplap behind it also.

Next we installed the shiplap on the wall. We drew the area of the inside of the fire surround on the wall so that we knew where the shiplap needed to be placed and we used coins (equivalent of a nickel) as spacers to create a gap in between the planks of tongue and groove. We used Gorilla glue to stick it to the wall since the pieces of wood were light and we were confident it would hold. Alternatively construction adhesive could be used.
I applied another coat of paint before we installed the fire surround.

The fire surround then slotted right around the shiplap when we put it all into place. We also drilled a hole through the two sides of the fire surround on one side so that the wire from the fire could slot into it. We ran the wire straight across rather than on the hearth as it created a cleaner line this way. I may paint the cable at some point to blend it in with the shiplap behind.

Where the skirting board was cut it doesn’t fit right up to the fire surround as it was very hard to cut accurately as it is not solid wood and we possibly weren’t using the best tool. I was able to reapair the damage from removing the skirting board with wood glue and wood filler. And I also used a filler on the wall to fill in any dents and touched up with paint all around the mantel. The gap can easily be filled with filler or caulk to neaten this up. This picture also shows the wall fixings we used to secure it to the wall, and two more were placed at the top also.

This is the finished result! The electric fire was another marketplace find and although it required a good clean up when we got it, it was the exact style I wanted and saved so much money buying secondhand. The fire is also so realistic and heats up the room so quickly which is a bonus of having to use electric to complete this on a budget. Although I have put 10 hours for the time it took to complete this it was actually very fast to get done. It just took us longer as we have a small baby and so completed in stages and small chunks of time. But by everyday standards it probably wouldn’t take as long.

We still need to figure out how we are going to hide the cable from the electric fire. We’re about to embark on stage two of the update to this room so that will be figured out then as obviously we don’t want a cable on show permanently.

I wasn’t sure initially if the shade of paint (I used raw silk) was too creamy but I love it. It’s the perfect shade of warm white and feels cozier than if I had used a bright white, although I think this would also have looked nice.

I cannot wait to decorate this space for Christmas! It is so cozy having this and we’ve used the fire so much already. I love the character that it has added to the room and it really feels like it was meant to be here! I’m so happy also that I was able to get this done for under £100.
I hope this post inspires you to add those dream features to your home!
To see more of this and other projects follow along on Instagram!
~ Rachel ♡