

I then began to trace. This takes awhile so make sure you’re in a comfy spot. (;

Once you’re doing tracing everything, remove the printouts and you’re left with your basic outlines!

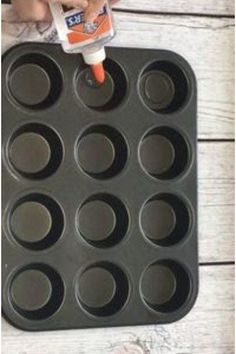
Next, you’ll mix up your colors! I used Elmer’s clear school glue, acrylic paint and a cupcake tin. This was the easiest way to keep the paints from mixing. I used about 2 tablespoons of clear glue to 1 teaspoon of paint. Be sure to mix this well.

And let the painting begin! This was so relaxing just like coloring.

After, you’re left with this one of a kind work of art! It was so rewarding for me to finish this and turn it over to reveal my beautiful stained glass! I’m not displaying mine in front of a window because I love in an apartment and they are floor to ceiling, but I LOVE the way it pops on my white wall! The best part is, you don’t have to be an artist!
We want to help you DIY, so some of the materials in this post are linked to sellers. Just so you know, Hometalk may collect a small share of sales from the links on this page.