Toddler Room Makeover: DIY Closet Built In’s With Dresser

Trending videos

Wardrobe and Dresser


Using 3/4 inch plywood (or wood of your choice, plywood is super heavy and these are almost 8 feet tall so it was very difficult to move this upstairs) build a frontless box by using a pocket hole jig (we use the kreg brand ones) this allows you to have all your screws hidden on the outside back of the wardrobe, you do not want to see screws or pocket holes when you open the closet.

I used an iron on edge banding to hid the plywood edges, you can also use a trim piece which is usually a 1×2 of select pint or poplar but that will add to the depth of your box.If building this floor to ceiling like we did make sure you leave a little bit of “wiggle” room on the height for the install you will hide the gap with trim later.

Next you will use a foam roller to prime the sides of the wardrobe that will be seen, we left the insides natural because we like the look and I am too pregnat to stand in there to paint.I used two coats of Kilz all purpose primer and two coats of Behr Ultra Scuff Defense Paint in Pure White-Semi Gloss(Sand with 220 grit sandpaper in between each coat)The dresser was built in the same fashion but we did it backless in order to to save on wood and weight, the drawers will cover this and you’ll never know.You will screw the cabinets into the base and studs in your wall. We also screwed the dresser into the wardrobes.

Dresser TopTo make an easy top for the dresser you will glue two pieces of plywood together and glue a piece of 1×2 trim to the front

Again, two coats of primer and two coats of paint with a foam roller(sand with 220 grit sandpaper in between each coat)

Screw in from the inside of the dresser

Closet doors/Drawer Fronts & Drawer Boxes

To build the closet doors you will use a dado blade on a table saw to create a groove on the sides of the side trim, then using the pocket hole jig you will create pocket holes on the backside of the trim pieces and attach those. Then slide the 1/4 inch plywood panel into the frame(I do not have photos of this step but is all in the video)

This is what a dado blade creates

For the drawer boxes you will build a 4 sided box with pocket holes on the very back and very front piece (so you will not see holes once installed)Using the dado blade create a grove on the bottom of all sides to slide a piece of the 1/4 inch plywood in to make the bottom of the drawer (you can use any wood of you choice and you can screw that in from the bottom if you do not want to use a dado blade)


Scott created a jig that was the exact space we needed in between each drawer and used that to level and install each drawer slide

Back to the doors…

You can see the pocket holes here and you will want to fill those with wood filler as well as the seams of the frame


After the wood filler is dry sand it smooth and you will caulk the inner seam on both sides

Then you can prime, again two coats makes the biggest difference, you can see one coat vs two coats below

The drawer fronts are created the same way but using a 1×2 instead of a 1×4 for the frame.Two coats of paintTo add the door hinges we use a door hinge jig that creates the perfect depth hole for the type of hinges we used to sit in.

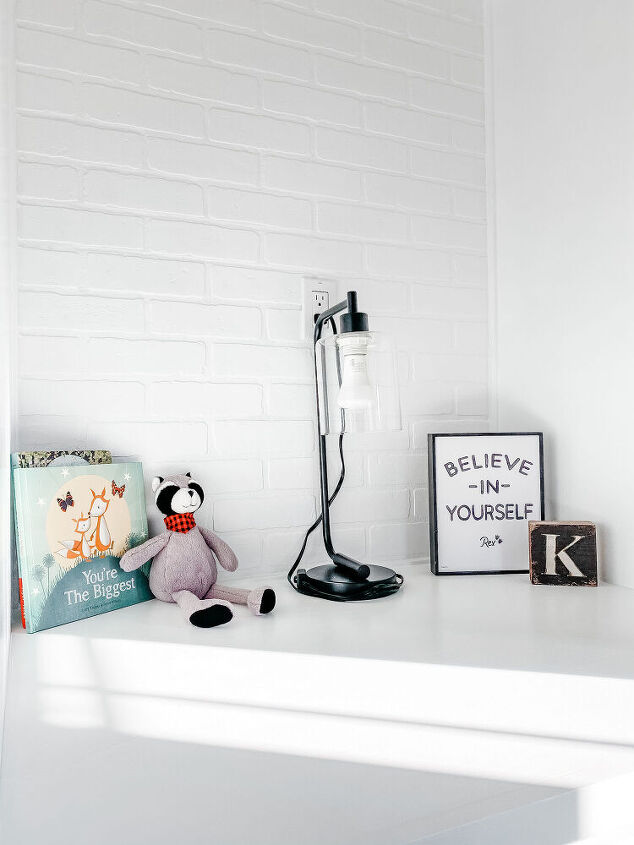
Brick Accent WallThis is a step that can be skipped or changed for your own preference, shiplap looks really great on this type of project too but we will be doing shiplap on a different project for this room later so I wanted this area to still have a fun texture but not .

cut your brick panel to fit the spacewe just use a brad nailer to secure it (we have these in multiple places and have never had an issue) you can also add liquid nails to the back if needed.

I did two coats of Behr Premium paint & primer in one in pure white in eggshell. I did not want any shine on a brick surface.

TrimAdded 1×3 trim around the entire built in and also a small piece of trim on the sides of the wardrobes that go into the brick to hide the seams

you will have to fill the mitered corners and nail holes with wood filler, sand when dry.


Caulk between the ceiling and trim, walls and trim or wardrobes, wardrobe sides and dresser. Everywhere that has a gap caulk.Then I primed and painted with the same Behr Scuff Defense paint


To install the drawer fronts we screwed them in at a slight angle so the screw went into the side frame and not the 1/4 inch plywood panel.Yes I should’ve filled the pocket hole and painted…

Handles

I chose these simple black pulls


If you enjoyed this post please follow me on Instagram and subscribe to my YouTube Channel
