
SUPPLIES
Choose and order your custom Modello. A weeding tool & burnishing tool are provided with your order. My pattern is OrnCen139, 22″ wide, positive weed
” stencil brush and Rich Brown Stain & Seal (water based)
Tape, scissors, pencil, level, ruler, absorbent paper towels like Bounty
Choose and order your custom Modello. A weeding tool & burnishing tool are provided with your order. My pattern is OrnCen139, 22″ wide, positive weed
” stencil brush and Rich Brown Stain & Seal (water based)
Tape, scissors, pencil, level, ruler, absorbent paper towels like Bounty

STEP ONE
Your Modello will arrive in a three-part “sandwich.” The package also includes in-depth instructions for preparing and installing your Modello. The following steps are my process for this project.
Use the white tool to burnish both sides of the Modello to prepare it. Then hold it up to the light and mark the centers – horizontal and vertical. Mark with pencil lines so you will have reference points later.
Pre-release the pattern from the heavy paper layers: On each side, grab a corner and gently peel the paper back half way. Push the released paper back on to the pattern. Turn the other way and repeat. Use the pick tool to press down any designs that may want to roll off.

STEP TWO


Use the weeding tool to poke a small hole in the center of the Modello. Mark the center point on the furniture piece with a pencil dot. Push the pick tool through the Modello and then line the Modello center up with the furniture center. Tape it in place and use the level to check the position. Reach behind the top of the Modello under the tape and gently, slowly, peel the heavy paper down, stopping every few inches to burnish the design in place. Then grab a corner of the remaining sticky paper and slowly peel back, making sure none of the design comes off with the paper. Just burnish as needed.
Tape all four edges so that you don’t stencil over the edge of the Modello.
Tape all four edges so that you don’t stencil over the edge of the Modello.

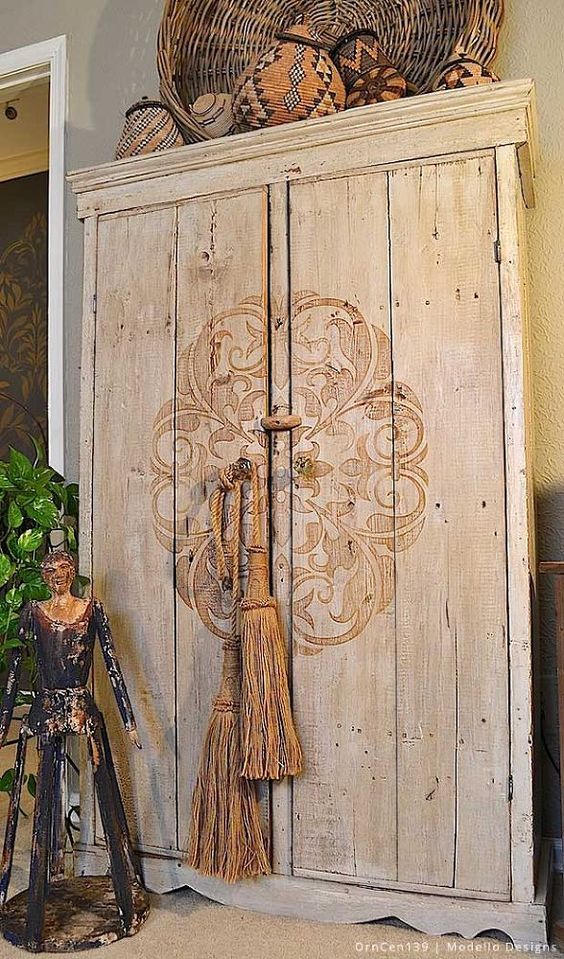
PRO TIP: This old cabinet’s doors were not flush with the center support piece, so the Modello not only had to bridge gaps, it did not touch the center support. Never fear, this is an easy fix. Simply use scissors to cut each piece and stick it on the support and burnish.

STEP THREE

Dip the tips of the stencil brush in the Stain & Seal, offload all of the excess stain, and stencil the entire design, using a vertical motion, going with the grain. The stain dries almost on contact. Very lightly sand the stain – with the Modello still in place. This creates a pretty edge around the pattern. Remove the Modello with the weeding tool. There is no need to seal the stain, since it actually seals itself!

It’s obvious to you by now that I love a touch of primitive, and this design works beautifully with my painted wooden figure.
If you’ve caught the Modello bug after this project, check out our blog Paint + Pattern for more DIY projects and inspiration!
If you’ve caught the Modello bug after this project, check out our blog Paint + Pattern for more DIY projects and inspiration!