
FIRST PROJECT: SHOWER/TUB REFINISHING!
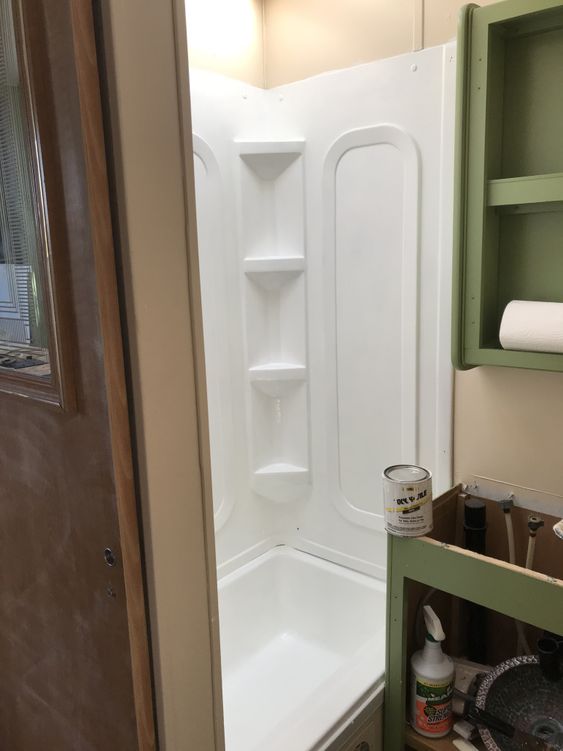
This is what we started with – a faded and yellowed shower/tub that was strong/solid enough to not need replacing. After some research, we learned that the best way to update it was to refinish it with a liquid epoxy that would give the plastic a porcelain-like finish. Further research showed that Homax Tough As Tile was highly-rated and within the budget we were willing to spend.

I had read some tips and tricks from others who had epoxied their own tubs (gotta love Pinterest!), so I had a clear idea of what to do and what not to do.
I gathered supplies to prep the tub for resurfacing.
SUPPLY LIST:
- Sand paper (220 grit)
- Cleaners (vinegar-water solution; Simple Green; Goo Gone)
- Face mask (that stuff is seriously smelly, especially in a small room)
- Fan (to suck the smell out)
- Homax Tough As Tile
- Paintbrush
- Paper towels
- Gloves
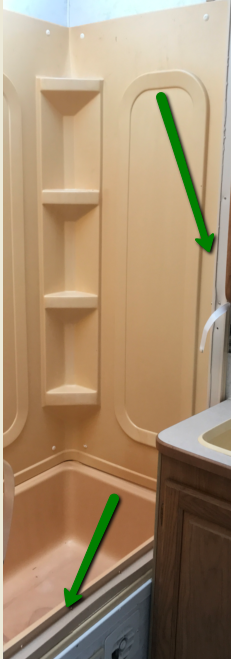
I began by removing the metal panels that previously-held the long-gone shower door. They were held in with screws and glue-bonded on, so after removing the screws, I had to pry them up and off, which was no easy feat. Once they were off, I coated the area in Goo Gone, which is the best stuff for removing sticky crap from anything. I also removed the hardware (shower head, faucet) so I had a clean work-palette.
Impediments now gone, I lightly sanded the entire tub to give the epoxy a better chance at adherence. Using Simple Green, I cleaned off the years of grime that had collected while the RV sat unused. That alone made the tub better than I had expected, but it was not anywhere close enough to call off this epoxy job. Then, the whole tub/shower got rubbed down with a vinegar-water solution (about half-half). Once that was thoroughly dry, it was time to get started on the epoxy.
I opened all the nearby windows, including the vent in the ceiling, donned my face mask, and got to work. The skylight over the shower provided ample sunshine to light my way.


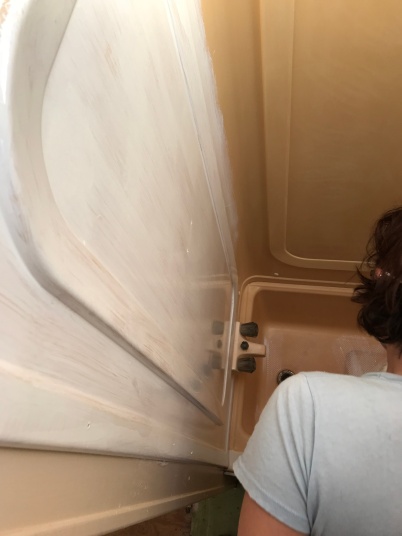
The epoxy was much watery-er than I had expected it to be. I was thinking it would probably be so thick that the quart-container wouldn’t be enough for two solid coats. To my surprise, it was thin enough that I had to return to previously-painted spots to smooth out drips in a lot of places.
UNFORTUNATELY, THERE WERE A FEW DRIPS I MISSED (AFTER PUTTING ON THE SECOND COAT) THAT ARE NOW PERMANENT PARTS OF OUR RV SHOWER. OH WELL, I GUESS WE CAN JUST SAY THAT THEY GIVE IT CHARACTER, RIGHT?!
The instructions for the paint-on epoxy state that you have to put the second coat on about 3 hours after putting on the first one. So, after finishing the first coat (took about an hour including fresh-air breaks), I assisted Danny with demolition in the sitting room while the epoxy dried.
For Keep Reading Please Head On Over To Next Page Or Open button (>) and don’t forget to SHARE with your Facebook friends