

Lay the plastic cooler between the wooden legs to determine the size of each side.

Cut your pallet wood to fit inside the legs. Apply wood glue and then screw the pallets onto the legs.

Lay the plastic cooler in between the legs again to determine the size of the front and the back.
Cut the pallet wood to fit, apply glue and screw the pallet wood onto the front and back pieces.

With the plastic cooler in place, add a piece of fence post to the bottom of the plastic cooler for support.
Screw this piece to the edges of the sides.

Add a wooden ledge around the top by measuring around the outside edges. Cut each piece of wood to fit
Screw the pieces of wood to the edges of the wooden cooler.

The wooden top is a box. Make a frame by measuring around the lid of the plastic cooler. Rip the fence posts in half and screw the pieces together to form a box.
Lay the box on top of the pallet wood and measure how long the pallet wood should be cut.
Cut the pallet wood to fit the top of the box.
Screw the pallet wood onto the top of the wooden box

Set the wooden lid upside down.
Place the plastic cooler lid inside the wooden lid
Screw the plastic cooler lid to the wooden lid.

For drainage, you’ll need a faucet, plumbing coupling and a piece of PVC pipe.
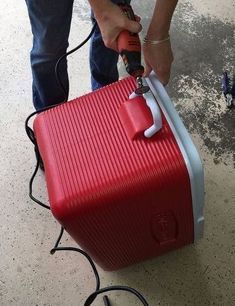
Cut a hole in the side of the wooden cooler where there drain plug is located on the plastic cooler.
Place a faucet into the hole made in the wooden cooler.
Place a coupling between the plastic cooler and the wooden cooler and screw the faucet into the coupling.
Place a piece of PVC piping into the hole of the plastic cooler and then into the coupling.

Attach hinges to the back of the lid
Attach a handle to the front of the lid.
Attach a bottle opener to the front on one of the legs.

Fill with ice and drinks. Happy summer everyone, cheers!!