
Renter’s Cabinet Cover Up

STEP 2: Measure your fabric Lay your door onto your fabric and cut out a piece of fabric with a good 1.5″ excess on each side.

STEP 3: Staple the fabric Grab your staple gun and staple the fabric down to the back side of the doors. You will start by stapling one side and then the other making sure the fabric is nice and taut. If you are worried about the staples you can also use mod-podge or just extra starch on the edges to secure it in place

STEP 4: Fold the fabric for the corners For the corners of the door you will need to fold each side over one another and then staple it in place. It helps to pull up the corner of the fabric over the edge and then fold one side over and then the other over that and then stapling through all 3 layers.

STEP 5: Seal with liquid starch Once all your sides are stapled down seal the fabric border in place by spraying it with some liquid starch. It serves as a temporary glue and will keep your fabric in place.

STEP 6: Prepare the cabinet frame Cut pieces for each section of the cabinet that lies behind the doors with some excess on each side to fold over and around the edges. For each section spray the surface with the liquid starch.

STEP 7: Add fabric to the frame Grab your fabric piece fold over one edge so it is clean.

Stick your fabric to the surface and spray it down with more starch making sure it is nice and smooth. I found it helped to go with the seams of the wood as a guide for where the strips of fabric will meet.

STEP 8: Get rid of the excess fabric Wrap the excess edges of the fabric around the edges of the cabinet and staple them in place (again if you don’t want to staple you can use extra starch or mod-podge to seal the edges in place) making sure the fabric on the front surface is lying nice and smooth. Add more liquid starch to help smooth it out and keep it in place. Repeat steps 6-8 for all uncovered sections of your cabinets. *For drawers you will use a combination of how you cover both the doors and the back surface.

STEP 9: Spray down every crevice with a liberal amount of fabric protector. This will help to keep the cabinets water and stain resistant. Since kitchens get dirty this is a MUST! When you are ready to remove the coverings you just remove all the staples with a flathead screwdriver and wash away the starch with a wet sponge and some soap.

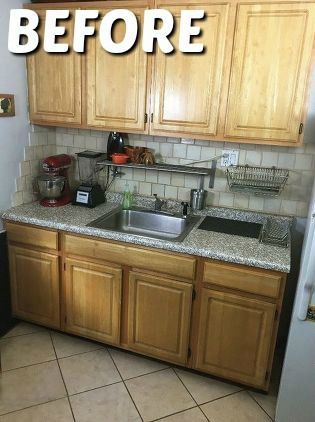
Here is a before and after of the cabinets! Such a transformation! I must say I do love an emerald green color in the kitchen. I may have to add some hardware!

Though I would prefer to just paint them, this is a nice option for those who aren’t able to paint and want something different from what they have got going on in their rental!

I did take an iron and press out the folded creases to help make the seams nice and tight!