
Tutorial and photos after the jump.
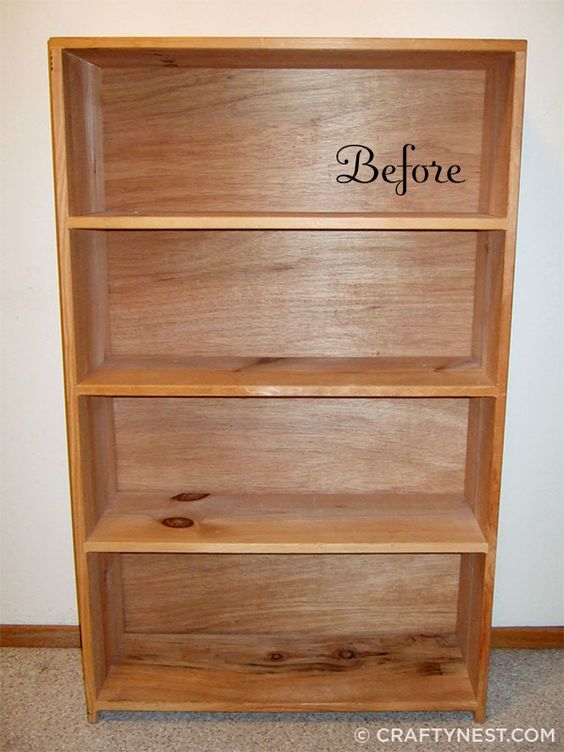
How to make a china cabinet from a plain bookshelf

Supplies
- table legs (I used 15-1/4-inch Country Pine Traditional Wood Table Legs
from Lowe’s)
- wood
- 1×10 (for base and top)
- crown molding and other trim boards
- 1×4 (for skirt)
- 1×2 (for reinforcement)
- sheet of bead board (for back)
- wood glue
- caulking
- wood filler
- finish nails
- L-brackets & screws
- four 5/16-inch lag bolts
- 1-1/4-inch nickel cup hooks
(available at Lowe’s)
- paint (I used white and pale blue [Behr Prelude 740E-3])
- primer
- drywall anchors (optional)
Tools
- hammer
- tape measure
- clamps
- screwdrivers
- pliers
- nail set
- sander & sandpaper
- drop cloth
- paint brush & small roller
- stud sensor (optional)
- vacuum
- tack cloth (optional)
- miter saw, table saw, and all the safety equipment that involves (or a friend who will cut the wood for you)

1. Start with a sketch to record the bookshelf’s measurements and determine the amount and lengths of wood trim you’ll need. (Click the sketch to see it bigger.)
2. Remove the back of the bookshelf. Mine was falling off anyway, so I removed the rest of the staples it was hanging on with. Use a flathead screwdriver, hammer, and needle-nosed pliers to remove the staples.

3. Gather tabletop and skirt pieces. As you can see, the plan changed slightly from my original sketch. I decided that attaching the bookshelf on top of a table base would work better.
First, cut a 1×10 the same size as the top shelf of the bookshelf to use as a tabletop. Then choose a piece of wood to use as a skirt. A 1×4 works well. I used a curvy piece of wood that I found at a salvage yard to use as my skirt.

4. Attach the legs and skirt. Place the edges of each leg flush with the corner of your tabletop. Mark and pre-drill holes, and attach each leg to the tabletop with a 5/16-inch lag bolt. Then measure and cut the skirt pieces to fit snug between the table legs (front and two sides). Inset the skirt a quarter inch from the edge of the tabletop, and attach the pieces with L-brackets, screws, and wood glue.

5. Secure the bookshelf to the tabletop. Clamp the skirt pieces to the tabletop and hammer in a few nails from the top to secure the skirt. I used finish nails and a nail set.
Place the bookshelf on top of your table as in the picture at step #3. Because the skirt is inset 1/4 inch, you will be able to hammer a few nails through the tabletop (bottom to top) into the bottom of bookshelf on both sides. That, along with wood glue, will attach the bookshelf to the base. It’s not as secure as we need it yet, which is partly why we’ll add the trim boards below.

6. Reinforce the top. You will need a wider surface to attach the crown molding to. Glue, clamp, and nail pieces of wood around the top edge of the bookshelf to support the crown molding. I used 1x2s at the front, sides, and part of the back.

7. Attach the top. Cut a 1×10 the same size as your bookshelf, then glue, clamp, and nail it down to your reinforcement pieces. This is the new top of your bookshelf.

8. Attach the moldings/trim pieces. Attach the crown molding at the top (front and sides), the trim pieces at the bottom (front and sides), and the three shelf trim boards (front). Use wood glue, finish nails, and a nail set (to counter-sink the nails). The job is much easier with a electric nail gun, but it can be done without one. Make sure you hammer nails into the top and bottom edge of the trim boards that cover the base of your bookshelf, to secure the bookshelf to the table base.
Tip: It’s hard to hold the boards in place by yourself and hammer the nails, so find a helper for this step. I had to yank out a nail or two and start over.
9. Fill the holes. Use wood filler to fill all the nail holes, and use caulk to fill in gaps at the corners and edges of the molding. I find wood filler much easier to work with because I can always sand out mistakes when it dries. Caulk? Not so much.
10. Sand and paint. Sand all the surfaces and remove the dust with a vacuum and tack cloth. Then paint one coat of primer and two coats of paint. For larger areas, use a small paint roller, which makes the job faster and eliminates brush strokes.
Tip: Don’t be tempted to buy cheap paint rollers and brushes. You’ll end up tossing them and buying better ones. Splurge on the good stuff for a smoother, more even finish. And the job will go much faster. Click here for more painting tips from a pro.

11. Attach the backing. Either reattach your original backing or replace it with a sheet of bead board, like I did. I painted mine pale blue (Behr Prelude 740E-3). When the paint is dry, nail it to the back of the shelf unit.
12. Anchor it to the wall. My bookshelf is tall, skinny, and a bit top heavy, so it needed to be bolted to the wall, as most bookshelves do. Screw two L-brackets into the wall, one at each side, then screw the top of each bracket to the top of the shelf unit.
Tip: When anchoring to drywall, use a stud sensor to find a stud, then drill there. Or use a drywall anchor or “molly bolt.”

13. Screw in the cup hooks. Measure and mark where you want your cup hooks placed. I attached eight evenly spaced along the top shelf. However, I encountered a problem: My drill wouldn’t fit between the shelves. So I hammered a nail into each spot, yanked it out, and screwed a cup hook into each nail hole. If you have a smaller drill (or larger bookshelf), you will not have this problem.

14. Fill the shelves. Load your new china cabinet with dishes, vases, candlesticks, napkins—whatever you wish. My palette was inspired by Iris’ dishes in the movie The Holiday. (Iris was played by Kate Winslet.) Don’t I wish I had her cottage kitchen too.