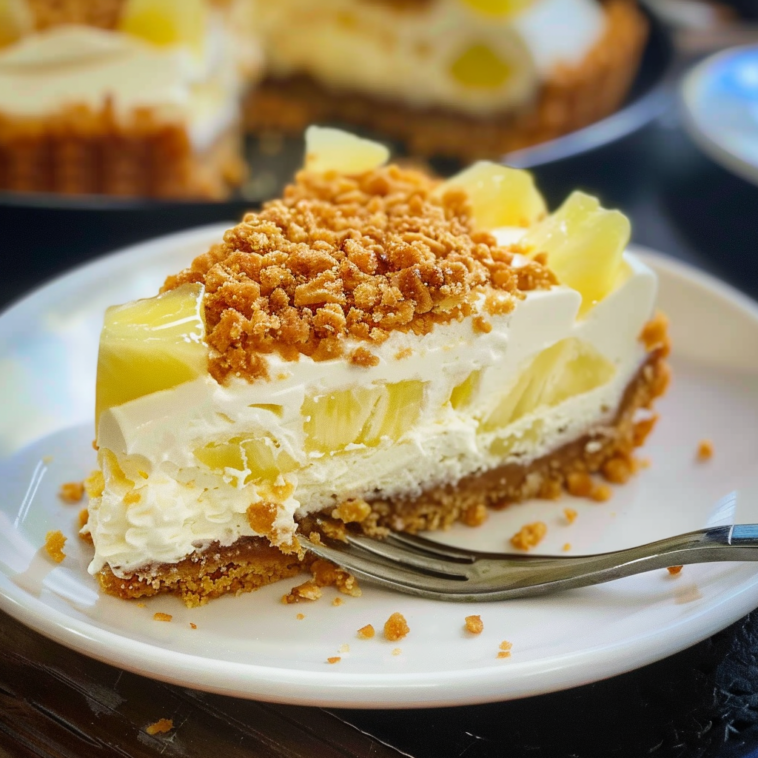
Ingredients
Before diving into the recipe, let’s gather all the ingredients you’ll need:
- 1 1/2 cups graham cracker crumbs
- 1/4 cup sugar
- 1/2 cup melted butter
- 2 packages (8 ounces each) cream cheese, softened
- 1 cup sugar
- 1 teaspoon vanilla extract
- 2 eggs
- 1 can (20 ounces) crushed pineapple, drained
- 1 package (3.4 ounces) instant vanilla pudding mix
- 1 cup cold milk
- 1 container (8 ounces) whipped topping, thawed
Kitchen Equipment Needed
To prepare this Pineapple Cheesecake Dessert, you’ll need the following kitchen equipment:
- Mixing bowls
- Electric mixer or stand mixer
- 9×13-inch baking dish
- Measuring cups and spoons
- Spatula
- Knife
- Cutting board
Directions
- Prepare the Crust:
- Preheat your oven to 350°F (175°C).
- In a medium mixing bowl, combine the graham cracker crumbs, 1/4 cup of sugar, and melted butter. Mix until well combined.
- Press the mixture firmly into the bottom of a 9×13-inch baking dish to form the crust.
- Bake the crust for 10 minutes, then remove from the oven and let it cool completely.
- Make the Cheesecake Layer:
- In a large mixing bowl, beat the softened cream cheese, 1 cup of sugar, and vanilla extract until smooth and creamy.
- Add the eggs one at a time, beating well after each addition.
- Spread the cream cheese mixture evenly over the cooled crust.
- Bake for 20-25 minutes, or until the cheesecake layer is set. Allow it to cool completely.
- Prepare the Pineapple Topping:
- In a medium mixing bowl, mix the drained crushed pineapple with the instant vanilla pudding mix and cold milk. Stir until well combined.
- Fold in the thawed whipped topping until the mixture is smooth and creamy.
- Assemble the Dessert:
- Spread the pineapple topping evenly over the cooled cheesecake layer.
- Cover the dish and refrigerate for at least 4 hours, or overnight, to allow the dessert to set properly.
- Serve and Enjoy:
- Cut the Pineapple Cheesecake Dessert into squares and serve chilled. Enjoy the refreshing combination of creamy cheesecake and sweet pineapple.
Tips and Variations
- Shortcut: If you’re short on time, you can use a store-bought graham cracker crust instead of making your own.
- Swap: For a different flavor profile, try using crushed mango or strawberries instead of pineapple.
- Add-Ins: For added texture, mix in some chopped nuts, such as pecans or walnuts, into the crust.
- Dairy-Free: Use dairy-free cream cheese and whipped topping to make this recipe suitable for those with dairy allergies.
Storing Leftovers
Leftovers can be stored in an airtight container in the refrigerator for up to 5 days. This dessert does not freeze well due to the texture of the whipped topping and cream cheese layer, so it’s best enjoyed fresh.
Food and Drink Pairings
This Pineapple Cheesecake Dessert pairs wonderfully with a light and fruity white wine, such as a Riesling or Moscato. For a non-alcoholic option, try serving it with a tropical fruit punch or iced tea. To complement the tropical theme, garnish with fresh pineapple slices or a sprinkle of toasted coconut.
FAQ
Can I use fresh pineapple instead of canned? Yes, you can use fresh pineapple, but make sure to finely chop it and drain any excess juice to avoid a soggy topping.
What if I don’t have instant pudding mix? You can substitute with a homemade vanilla pudding if you prefer. Just ensure it’s completely cooled before mixing with the pineapple and whipped topping.
Can I make this dessert ahead of time? Absolutely! This dessert can be made a day in advance and kept refrigerated until ready to serve, making it a great option for parties and gatherings.
Is it possible to make this dessert gluten-free? Yes, simply use gluten-free graham crackers for the crust and ensure all other ingredients are gluten-free.
Call to Action
If you loved this Pineapple Cheesecake Dessert, don’t forget to share the recipe with your friends and family! Subscribe to our blog for more delicious recipes and cooking tips. Happy baking!

