
No Sew Reupholstery – Making Over a Wingback Chair
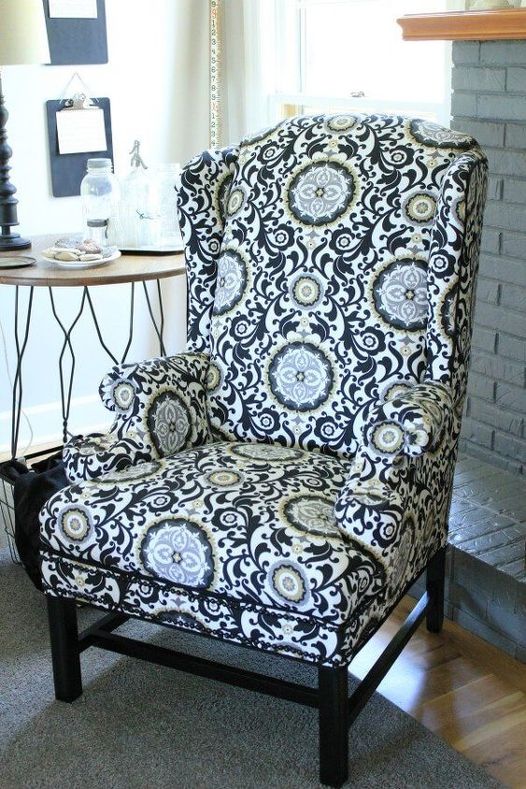

Then I followed the steps in reverse to reassemble the chair, using my notes and photos as a reference, cutting the pieces from the saved fabric panels that I used as templates. The fabric I used is Waverly Celestial Sun Twill Nightfall.

I opted for black piping to give the chair a little pop. Plus it looks great with the black nail heads and black legs. You can purchase pre-manufactured piping at your fabric stores, but I had some sewn from a previous project.
I spray painted the old brass trim black and added it back to the chair.

One disappointment was the armrests. I tried to nail the the brass tacks back on the armrests, but they wouldn’t go in straight, no matter how I tried. After about four hours of failed attempts, I abandoned the nail heads on the arms and opted for fabric adhesive instead.

The other tricky problem was getting the patterned fabric to line up.
This is where I wished I would have chosen a solid fabric for my first attempt at reupholstery.

It may not be perfect, but I’m very pleased with the end result!

It was a challenging DIY for this first timer, only because of the patterned fabric, but it’s super cushy and comfy and I’m proud to know that I rescued a piece from the dump.


UPDATE: A lot of questions have been asked about the legs and what changes were made. The brace behind the front legs has always been there. The before pic is an overhead shot and it’s not visible as it’s about 6 inches behind the legs, but it’s there. The only changes to the legs were paint. Thanks so much for all your sweet words.