
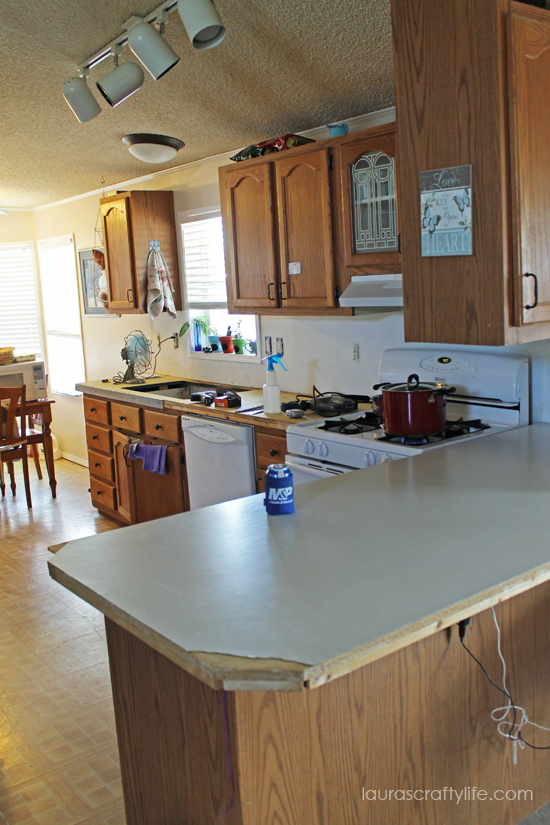
We started on a Friday night and were completely finished tiling by Sunday night. Not too bad for two people who have never tiled before! I am so blessed to have a handy husband. We actually work together really well on DIY projects. This is what the kitchen look liked when we started:
Below is a better picture of the laminate. We only peeled up the laminate with a heat gun behind the sink and next to the refrigerator. We left the below section in tact, since it was not peeling up, except in the corner where I tested out the heat gun.

My husband talked to some experts at the tiling place and they told us to put down a layer of DensShield. It is a moisture-resistant backer board which is definitely necessary in a kitchen. This provided a surface for us to smooth the mortar on to. (You should not install counter top tile directly to laminate or the old counter surface.)
Please note: The tile experts recommended we build all new counter tops and not use the existing ones since they are made from particle board type wood. We did choose to just use the existing ones, but I wanted to let you all know this should be done on a solid wood surface, instead.

You just cut the pieces to size and secured with coated deck screws. (If you do not use a coated screw, they may rust.)

You can see how we have the DensShield attached to the counter top and edges on all three areas we were going to tile.


We got all this done Friday night, so we would be ready to start tiling first thing Saturday morning. We chose glass mosaic tiles to go around the edges of all the counters. We cut the mesh backing down to size using scissors. Then, we did a dry fit to make sure we knew what we needed for each counter.

The angles on this counter were the trickiest to figure out. I used a protractor to figure out the angle, divided it in half, and that is how we cut the corners. We added mortar and laid down the tile. Since these are glass tiles, be sure to push down with your rubber grout float over the surface of the tiles to remove any lines you may have from the trowel.


We used these little grout spacers that are circles. These worked great and are easy to put in and remove! You can see the little green things in the pictures that look like alien space ships – these are the spacers.
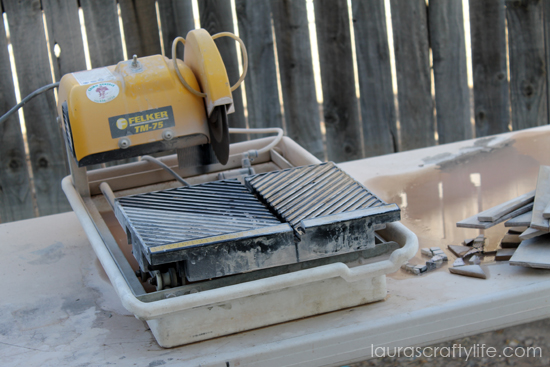
We ended up renting a tile saw. This is an affordable option if you don’t plan on doing a lot of future tiling projects (which we don’t).

Once we had completed the glass mosaic tile edge, we started on the main tiles. It was pretty straight forward. We did a dry fit of the tile and cut as we went. My husband cut all the tiles and I did the mortar and placed the tiles. We had a good system going after a little bit!

When we got to the counter top edges, we worked together again. We had to back butter the tiles. This means you apply the mortar directly to the tile rather than your surface. Smooth it on, run your notched trowel over it and place it on the edge.

We then used painters tape to hold the tile in place until it dried.

I don’t know how well you can see it in the above picture, but the edge tile and main counter tiles were not an exact match. We were able to save a bunch by getting the main tile on sale. By using a border of the mosaic tiles, we were able to use a darker edge tile and still have it look cohesive.
We finished with the tiling late afternoon and let them dry overnight. In the morning we grouted all the tile. We choose a grout that matched the darker edge tile. (I somehow have no pictures of this process – I think the camera ate them when I was having problems). When mixing the grout, we added a sealer directly to the grout powder you can purchase in the hardware store. This should help to keep the grout looking nice longer! After you put the grout on you have to wash and wash and wash with a large sponge until the tile is clean!
We also decided to go ahead and purchase a new sink, faucet and garbage disposal for the kitchen since everything was already ripped out! You can see below, installing the garbage disposal.

We had the sink completely ready to go before we installed it. It is much easier to attach everything before you place the sink back into place. After the grout was dry, we attached the sink and used clear silicone around the edge.
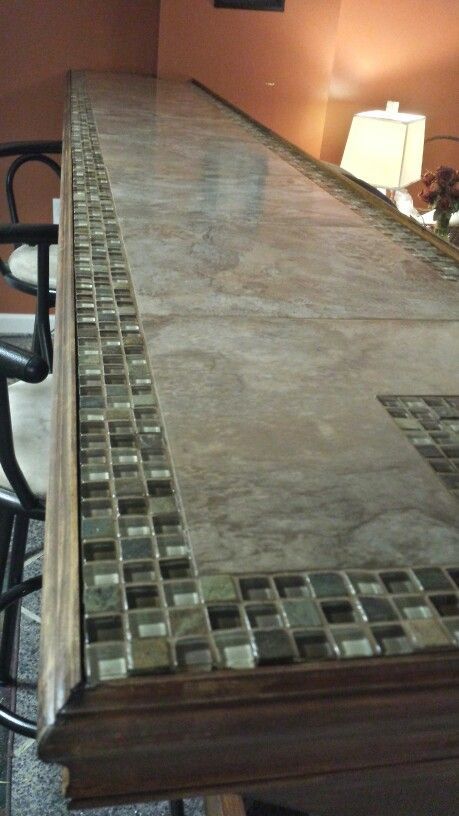
Here is a sneak peek of the finished tile, before we finished the back splash.


Once the tile was completed, we still had to install and paint the back splash. Stay tuned for the back splash and final reveal pictures. To be continued . . .