
How to Update a Builder-Basic Door
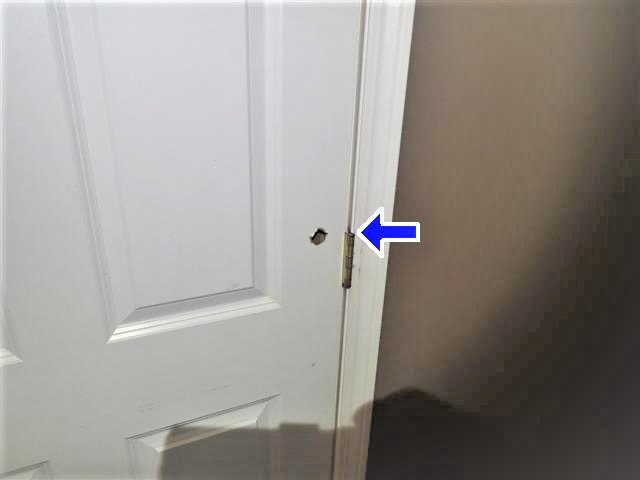

This door was damaged with a mysterious hole.
This guy needed help. HOW a hole got there, I couldn’t figure out. The garage door often swings into this door if they’re both open (ugh, nothing to do about the garage door), but they don’t touch anywhere near that hole… Hmm… A mystery that will never be solved. Anyway, I decided to cover it rather that replace the whole door.
Ok. To start, gather your materials. (As an Amazon Associate, I earn from qualifying purchases. But it doesn’t cost you anything extra and helps me keep up my site!)
Here’s what you need:
- Stain (color of your choice. I used walnut.)
- Brad nails (I used 3/4 inch to be sure not to go through the door.)
- Thin edge trim
- Wider edge trim
- 0.2 inch plywood sheet
- Sandpaper
- Wood putty
- Door handle (or use your existing handle if it’s removable)
- Door hinges (or leave yours in place if they’re not in bad shape)
- Brad gun
- Miter saw/circular saw/table saw/whatever you want to use to cut your wood. (This is thin wood, so even a handheld hacksaw could work if you have to.)
First you want to replace the hinges if you’re doing that. This was simple with a screwdriver, and I removed one hinge at a time, replaced it using the same holes, and everything worked fine.
Next, remove your door handle, even if you’re using the same one once the door is done. Since you’ll be placing a handle and cover plate back over your wood, it’s good to outline with a pencil where the plate will cover around the handle hole. This gives some wiggle room with just how accurate you have to cut the plywood strip that will run across that part of the door.
Next, measure the height of your door. This is how long you need to cut your wider edge trim piece and two pieces of the thinner trim. Most doors are a standard 80 inches. I used our miter saw because that was easiest, but you could use even a hacksaw since trim is soft and thin. AND, you’ll have to cut out an indent for your door handle if your trim goes over where the cover plate will be. I only had to use a hand hacksaw for a small chunk of my thinner trim, and with a little sanding it looks nice around the handle.

Thicker edge trim. Edges are flush!
I’m a cut-as-you-go kind of person, so I attached the wider, handle-side edge trim before cutting the plywood “shiplap.” (This also helps with the measurements for those shiplap pieces.)
Make sure your trim is flush with the edge of your door so it will open and close properly. I stood on a chair, held my trim in place up top, and used my beloved brad gun to shoot a nail in to hold the trim in place. Then I climbed down, made sure the trim was straight all the way along the edge of the door, and shot a nail to hold the bottom. Then I went up and down and nailed several more random places. Since this is the edge of the door and likely to be touched a lot, I wanted it secure.
With this edge trim in place, measure from the inside of that trim across the door to the hinge-side edge. Make sure your measurement will cover all of the front of the door, but don’t create any overhang in case that would cause issues opening the door. Better to be slightly short than slightly long, since you can cover your ends with that thinner edge trim later.
How wide you want your faux-shiplap pieces is up to you. I used my dad’s borrowed table saw and cut 6-inch strips. You could do 8-inch or 4-inch strips just as easily. Most standard doors are 80 inches in length, so that’s pretty easy math – but don’t forget about that handle causing some issues. I needed 7 of my 6-inch strips from the top of the door to where the handle would require me to notch out one board to leave space around the hole. (This doesn’t have to be pretty since the handle plate will cover any ugly edges of your cut-out.) After that hacksaw-cut board, I needed another 5 boards to cover the rest of the door…plus one thinner board to level out the bottom. (More on that in a second.)
Whatever wood strip size you choose, next use your across-the-door measurement and cut your plywood strips to that length. These will be close to the full width of your door, but don’t forget about subtracting the width of your already-attached trim. My plywood strips ended up needing to be 30.5 inches long. To cut my lengths, I used our miter saw, which was easiest.
You’ll definitely want to sand the edges of the plywood. The ends don’t have to be perfect because they’ll be covered by your thin pieces of trim, but the long sides will show. I also lightly sanded the fronts of the plywood to get rid of rough spots.
Now to put it all together! I started at the top since I figured I could adjust at the bottom less noticeably if anything was off. Standing on a chair with my brad gun held between my knees (maybe not the best approach, but it worked), I held one end of the plywood strip against my attached trim, then made sure the top was level and flush with the top edge of the door and also that the far end didn’t overlap that hinge side.

Line up plywood end along the attached trim.
Seeing that my measurements were correct, I nailed the plywood strip at top and bottom in the middle of the door, then put 2 more nails at each end to hold it in place. After that first board, I simply held the next under it and nailed it on.
Repeat this until the bottom strip is all that’s left. If your bottom board needs to be cut down, you know exactly how much once the higher boards are secured. (Again, I trust my cut-as-I-go method, and I indeed needed a thinner board on the bottom.) You can also cut it at a slight angle if it’ll not totally level. It WILL look weird if the bottom of your door isn’t level, so make sure this last board looks good along the bottom edge of your door. So, cut this board if you have to (I did), then attach like the others.
The last pieces of wood to go on are your thin trim pieces along either side. These cover your plywood ends (and any unevenness there) and add a finishing touch, like a frame.

Attach thinner trim to hide the plywood ends.
Make sure your hinge-side trim doesn’t interfere with the opening and closing of your door, then nail it on. When you nail on the handle-side trim, making sure this is cut properly around where your door handle cover plate will go (as pictured earlier).

Love these door handles.
But I wanted a more modern look too, and all that took was a simple hardware update with black hinges and a new handle. (I used the same handles and hinges in ALL the doors in our upstairs hall too, to add uniformity. Love them! They give a pop of modern detail and weren’t nearly as expensive as a good many similar ones I looked at.)

My two pieces of trim all nicely together.

Notch the trim to fit the handle cover.

Make sure your trim doesn’t mess with your hinges opening and closing.
Now you’re all set to wood putty over your nail holes. I admit I skipped this step because I was in a hurry, but it would look better to do it. THEN you stain! I used a dark walnut because it tied in with the rest of my projects elsewhere.
Once your stain is dry, install your door handle. Again, I LOVE the ones I used and highly recommend them. They’re certainly nicer than our aged gold knobs that were on every door in our house, plus these kind are more toddler friendly…and since this was going on a bathroom, I was prepping for potty training. LOL
That’s it! Door done. If you go with this method of revamping a boring and/or damaged door, you’ll have a cool new front to your door that is now a focal point rather than an eye sore.

Ta-da! The finished door. So much better.

The “after.” This door stands out now!
As for the many other ugly-door-solving DIY projects this house required, stay tuned! Next I’ll convert our coat closet’s bifold doors that were falling off the tracks. By using a similar method to what I did above, they’re now totally cool and you’d never know they were bifolds in a former life!