
How to Make a Seat With Storage Space

2. Measure and cut two pieces of wood
Take your meter and measure the space inside the wheel, between the middle of one of the edges and the middle of the opposite. This measurement will help you trace the diameter of the seat covers.
Transfer the dimensions of the diameter to the wood and draw two equal circles. For this, the simplest thing is to screw a wooden strip to the board and use it as a compass (you must make a hole through which a pencil can pass, which is at a distance from the screw equal to the radius of the circumference). Then, you just have to turn the ribbon and it will be a perfect figure.
Trending videos

Next, cut the two circular caps with a jigsaw and sand the edges well to ensure a smooth, professional finish.

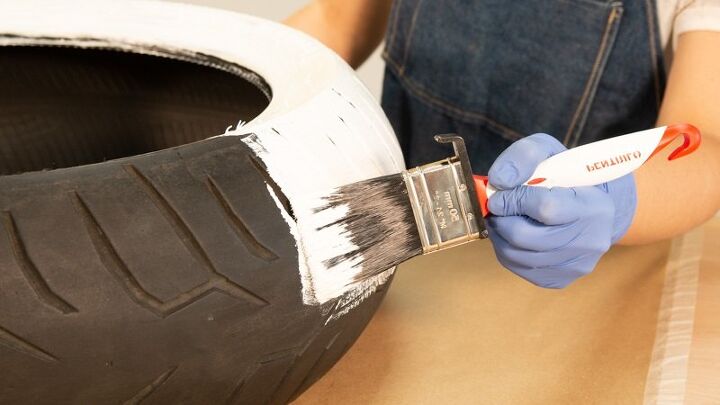
3. Paint the tire and base
It’s time to color your seat! Take an acrylic paint bottle of the color you prefer and paint the outside of your tire, as well as the piece of wood that will be placed on the bottom of it, with the legs. Then let the paint dry for the amount of time indicated by the manufacturer.

4. Screw the base to the tire
It’s time to assemble the structure! Using a drill, drill several screw-sized holes in one of the wood caps that will attach the wood to the tire. Then insert them so that the heads are on the outside of the seat. To secure them, you must turn the tire and, from the inside, tighten them with nuts, using a wrench.
We have used 4 screws.

5. Attach the legs to the base
The next step is to place the legs on the base of the seat. To do this, we recommend marking with a pencil where you want each one to be placed. Then make the holes following these marks. Remember to use a drill bit the same size as the screws on the legs. Insert them and secure them with nuts from inside the seat.

6. Upholster the seat
You have now reached the final step, with which you will finish customizing your seat. 🙂
Take a sheet of foam and draw a circumference slightly larger than the circular seat covers. Cut it with the help of scissors and “wrap” the cover of your seat, stapling the foam to the wood.

Repeat the procedure but with a piece of cloth. It is important that you choose the design of the fabric carefully, as it will be what stands out the most from the stool. Cut it off and staple it to the inside of the lid, over the foam.

The stool is ready! What did you think of this tutorial? Leave us any questions in the comments section.