
SUPPLIES:
- Q-tips
- Old rag
- Nail Polish Remover
*Note: As mentioned before, I had Behr Exterior flat black paint on hand so instead of going out and purchasing a glossy finish black paint, I used what I had on hand. Then, I used Rustoleum clear gloss sealer that I had on hand on top of the flat black paint in order to give the faux windows a gloss finish.

OPTIONAL SUPPLIES TO ADD EXTRA TOUCH: -4 (6″) Everbilt Decorative Tee Hinges -7/64” drill bit (recommended on hinge packaging for pilot holes) – Rustoleum Hammered Black spray paint – Dewalt 12v drill – phillips head screw bit

STEP 1 (optional but recommended): First, I sprayed all-purpose cleaner on the garage door where I was going to paint and gave the areas a good clean to ensure all dirt and debris were removed.

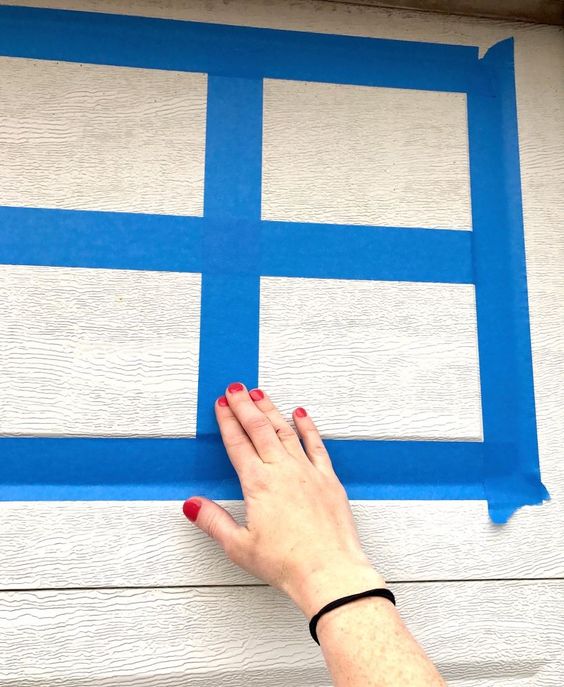
STEP 2: Tape off “windows” Next, I used painter’s tape to create 4-paned windows on our garage door. Most garages I’ve seen are pretty much the same as far as design, however, you may need or want to change up your design depending on the type of garage door you have. I simply created four windows straight across the top of our garage door, lining the tape up around the square panels on the door.

Here is how the garage door looked once all of the windows were taped off. Feel free to use a level and pen/pencil to mark your windows evenly–I simply eyeballed everything.

STEP 3: Paint “windows” After all of my windows were taped off, I used a sponge brush to apply one coat of black paint. Then, I let the paint dry completely and applied a second coat. If you’re using a glossy black paint, you are finished with this step unless you feel like you need more. If you’re using flat black paint, let the second coat dry completely and then apply 1-2 coats of Rustoleum clear gloss sealer.

STEP 4: Remove tape Finally, I removed the painter’s tape once all of my paint was completely dry….

…then I took a Q-tip with a little nail polish remover to erase any super noticeable bleeds. I figured no one will be looking at these faux windows with a microscope so I just got rid of any heavy bleeds that were able to be seen from afar.

STEP 5: Attach hardware (optional): I decided to take our garage makeover to the next level by adding gate hinges to the left and right sides of the door. I simply did this by marking the holes for the hinges, then drilling pilot holes for the screws. After that, I used the screws provided with the gate hinge hardware and my drill/screw gun to attach the gate hinges.

STEP 6: Spray existing handle/lock (optional): One last thing I did to spruce up our garage was spray paint the handle/lock with hammered black spray paint. Because our handle is attached to the locking mechanism, I didn’t want to get into changing the whole thing out—Lord knows how much that would have cost!—so I simply used spray paint I had on hand to have the handle match the gate hinge hardware I installed. If you decide to do this step, make sure to use your painter’s tape to tape off the handle and be very conservative with the spray paint so as not to accidentally spray the door.

I sprayed a light coat, let that dry, then touched up any places that I saw still needed paint.

Once the handle was dried completely, I removed the painter’s tape.

It’s far from perfect, but I’m so happy with how this came out—I feel like we have a brand new garage! Now maybe it will look a little more like a legit, functioning garage! *I know people are going to ask, but the piece of wood randomly screwed above the garage door was an old sign that came off and I didn’t want to wait for Rob to remove the rest of it for me to do this project–haha–impatient pregnant lady here! 🙂 ***Note: This project only cost me about $32, because I only needed to purchase the decorative hinges, since I had all other supplies on hand.