
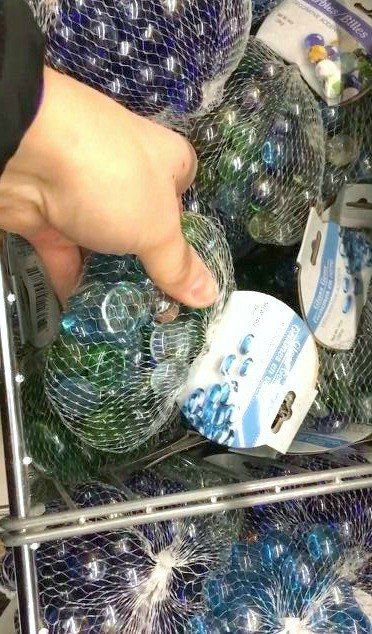

So I went to the Dollar Store and purchased three bags of gems that came in assorted colors – clear, light blue, dark blue, and green. These would be perfect colors for this room.
They were pretty dusty so after I sorted them, I washed them with blue Dawn and rinsed them well.
I don’t know if you can see the difference between the before picture and after. They’re much brighter.

A-I drew a line under the mirror and then removed the mirror
B-I then drew lines from the edge of the sink to the line under the mirror, just so I had a reference line.

Because this is near a sink and will be exposed to water, I wanted to make sure it was done properly.
I bought Mastic which is an adhesive. This container was more than enough for this little project.
I also bought this little notched scraper for 99 cents. This is what I used to adhear the mastic on the wall.

Before I began, I used painter’s tape to tape off the top of the vanity.
A-Using my notched scraper, I applied a thin layer of mastic using the flat edge in a small area
B-I then turned the scraper to the smallest notch edge and made grooves in the mastic
C-I placed the gems onto the mastic pushing them gently into the mastic
D-I continued to add mastic to the wall in small sections
E-And continued to place the gems until I had completely filled in my marked off space.
I allowed the mastic to dry 2 hours.

While the mastic dried, I mixed up grout. This bag was much more than I needed. You can buy already mixed grout but it more expensive than dry.
A-Using a recycled plastic container, I added one cup of grout powder.
B-Then I added 1/4 cup of water and mixed. It didn’t seem to be enough water, so I mixed in another 1/4 cup of water. The ration was then 1:1/2.
C- I mixed everything together using a paint stirrer

According to the directions on the grout bag, you should let the grout sit for 30 minutes, stir it and then let it sit an additional 30 minutes.
A-This is the grout after 30 minutes. I gave it a good stir.
B-This is the grout after 1 hour. Perfect!

A-There is a tool to apply grout but I used a magic eraser which worked well.
B-I worked in small sections, squishing the grout between the gems.
C-I made sure the grout was even and there was grout between each gem.
D-Once I had grouted the entire wall, I went over it again to make sure there weren’t any gems covered with a lot of mastic.
One cup of grout + 1/2 cup of water was the perfect amount for my area which was 24” x 10”

According to the bag, allow the grout to set for 30 minutes & check to see if it’s dry.
A-After 30 minutes, I touched the grout
B-And it was still wet
C-after an hour, the grout was dry

Once the grout was dry, it was time to wipe off the excess.
A-I used a large sponge and warm water.
B-I made sure the sponge was not sopping wet, rung out well
C-Then I ran the sponge over the gems, removing any grout that on top of the gems.
I changed my water several times to make sure that I was using clean water to clean off the grout.

Once the grout was clean
A-I removed the painter’s tape
B-Some of it was stuck under the grout so I used a utility knife to cut it out.
C-I added a bead of chaulk along the edge
D-and smoothed the chaulk with my finger

I love the way it turned out. And I learned a new skill. I had never worked with mastic and grout and I was pleased at how good everything looked.
Here’s a closer picture. I like the unevenness of the sides. It doesn’t look chopped off.
No more dirty, splattered wall!
The project was $20 because I purchased large containers of mastic and grout. I would estimate that for the materials that I used, the entire project cost $6.

Here’s a closer picture. I like the unevenness of the sides. It doesn’t look chopped off.
No more dirty, splattered wall!
The project was $20 because I purchased large containers of mastic and grout. I would estimate that for the materials that I used, the entire project cost $6.