
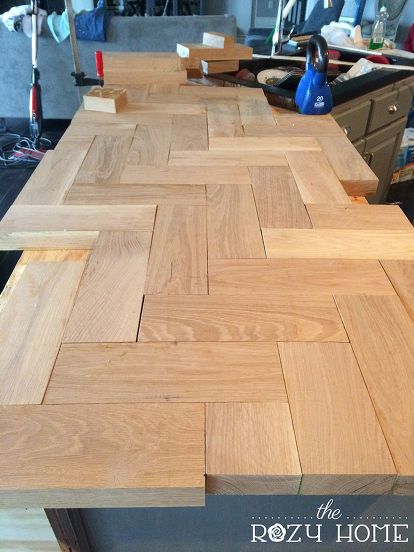
I used wood glue and clamps to attach the side/edge pieces.

Next I added the interior pieces. Since there wasn’t a good way to clamp them down, I used 20 pound kettle bells and other weights from around the house to hold the pieces down. You could also nail the wood blocks into the plywood if desired.

After everything was set (around 2 hours later), I added 1″ x 3″ trim along the sides, filled the gaps with wood filler and sanded.

To achieve the final color, I began by staining the wood black walnut….

Then I sanded it off. This step, for me, was vital because it allowed the stain to soak into the grain – giving the wood depth (If it were up to me, I would have probably just stopped here but the hubs hated it).

Next I created a white/gray wash. I mixed 1 part Snowbound (SW) with 1 part Classic French Gray (SW) and 2 parts water. I brushed the mixture on with a foam brush.

Next I brushed on a coat of ebony stain.

I immediately wiped it off with mineral spirits. It took a couple of pours of mineral spirits to get to the final color, but we loved it in the end. And yes, I actually poured the mineral spirits on the counters and wiped it off.

After getting the finish the way I wanted it, I added Watco Lacquer. I won’t say this was an easy project – but only because my island has a lot of angles. If you are lucky enough to have a straight island, you could do this project in a weekend.

The final product. The cost for this project has a lot of variables. I went with 2 inch thick wood so it cost a lot more than using standard 1 inch thick wood. I also used white oak instead of red oak (which is a bit more expensive). I had the mill plane and joint the wood so allI had to do was cut it to length. The entire kitchen was around $1200. The island was roughly half of that.