
DIY Perfect Baseboards

You will need to choose the type of baseboard look you’re going for first. We chose a very simple look. The baseboard itself with a quarter round finish. This is two separate pieces of wood. You will also need a chop saw like you see above, or just a miter saw will work. The reason being, you will need to be able to cut the wood pieces at an angle and it is much easier with the chop saw or a miter saw.

Here you can see the tall flat pieces (baseboard) up against the wall and then the skinnier rounded pieces (quarter round) touching the base board and the floor. My honey’s method was to make all the cuts first and lay everything out for what it would look like, then nail everything into place.

See the before picture above? This is what we ended up with when he was all done cutting all the pieces to size. He was NOT happy with that look and he wanted it to look more finished off.
The after picture is what he ended up with after reading the very informative article we found online. So much better huh?
Visit our blog at the link below to get the step by step trick to perfect baseboards!

Here are the pieces before they are joined together. You will need to add a bit of white caulk to the end cap before nailing it in to place, this will help secure it. Next step is nailing it all in place. We used our nail gun for a speedier process, but you can also use the old fashioned hammer and nails as well.

Look how nice and finished off those ends look now. After these are painted, they will be perfect!

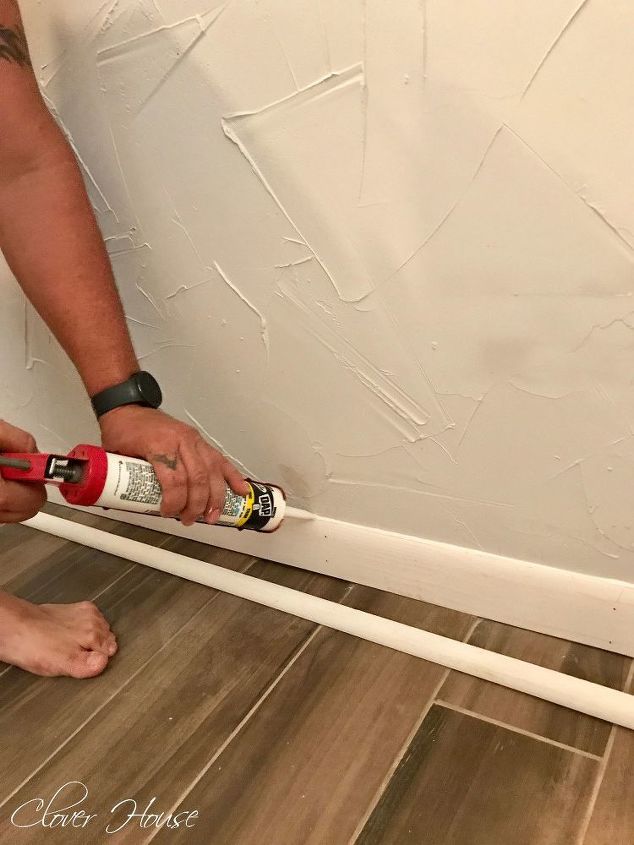
To finish off your baseboards completely, you will want to use a white paintable caulk. Run a very small bead of caulk along all the open gaps. With a damp finger, run your finger along the caulk bead to smooth it out. Wipe excess into the nail holes and then if needed, have a damp cloth in your hand for any unneeded caulk.

Gorgeous! All I have left to do is put a nice fresh coat of white paint on them and we’ll be golden!

Fresh paint for everything coming up and some new decor too! Stay tuned!