
With a little determination, I knew this table would turn out how I envisioned it in my head.
We couldn’t beat the $100 price tag so we took it home!
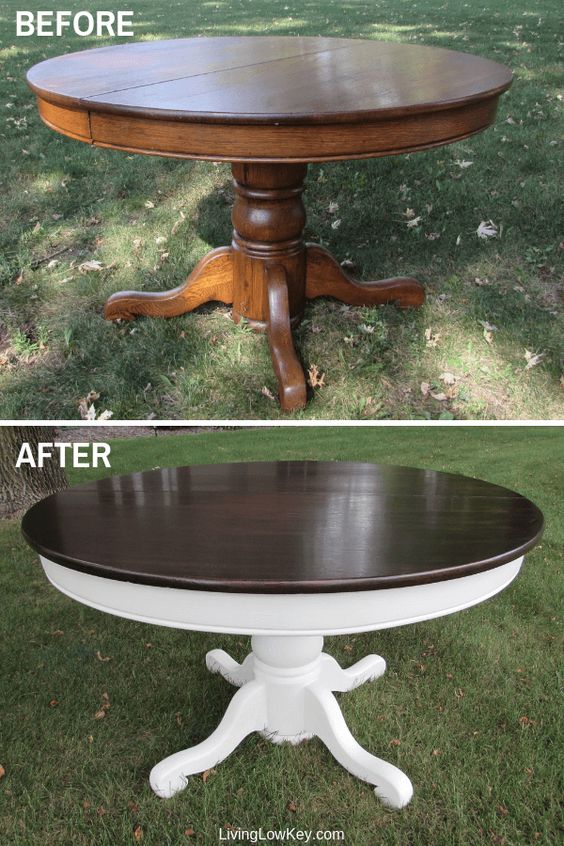
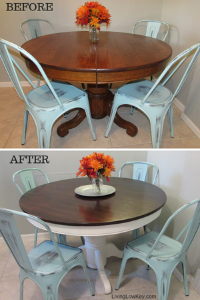
Turn Your Old Table Into A Farmhouse Kitchen Table
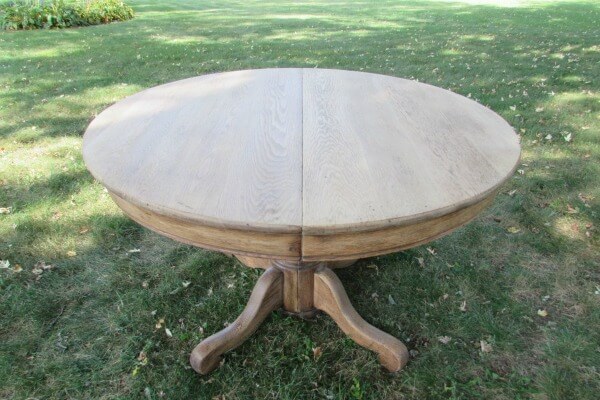
Here are the steps to refurbishing an old oak table similar to the one above.
You can use the same steps for just about any wood table. This DIY farmhouse table makeover will have your table looking like an expensive pottery barn farmhouse table, only for a fraction of the price.
Gather Your Supplies
3M 80 grit Sand Paper
3M 150 grit Sand Paper
3M 220 grit Sand Paper
3M 400 grit Sand Paper
Tack Cloth
Varathane KONA Wood stain
Varathane Semi-Gloss Polyurethane
Americana Décor Chalky Finish Everlasting
Americana Décor Crème Wax
Power Sander
1 Paint Brush
3 Foam Brushes
Plastic gloves
Cloth
Tape
The first thing you want to do before starting is to give your table a nice little scrubbing
We have kids and we used our table for a few months before we had time to conquer this project, so a good cleaning was a must. Then it’s time to move your table outside or into your garage.
Tip: Be prepared to be without a table during your dining table makeover.
Related money saving articles:
- Make More Money: 40 Surprising Ways To Make Cash Fast
- 10 Awesome Hacks That’ll Save You Thousands On Your Household Items
- 50 Genius Frugal Living Tips You Should Adopt To Save Money
- The Dollar Tree Store Should Be Your One Stop For Everyday Essentials
Sanding Your Farmhouse Kitchen Table
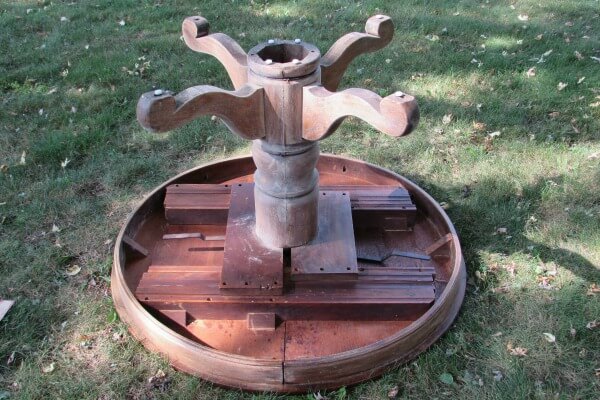
You can start by sanding the top or the base of the table, whichever you prefer. We started by sanding the base of the table. Flip the table upside down so you don’t have to hunch under the table.
We may or may not have crawled under the table for a good 10-15 minutes before it dawned on us to flip it upside down so we don’t kill our backs, lol.
We started with a piece of 80 grit sandpaper and began hand sanding the base of the table.
It’s surprising how fast most of the varnish came off.
Next, use the 150 grit followed by the 220 and then 400 grit sandpaper for a nice smooth finish.
You can use any combination of sandpaper, that is just our preferred method and it works quite well.
The lower the grit the more course and grittier the sandpaper will be. We tried starting out with the 150 but switched to the 80 because it wasn’t taking off all the varnish.
Once you’ve finished sanding use a cloth to wipe off all the excess dust. Any old piece of cloth will work.
Then use a tack cloth to wipe down the base thoroughly. If you haven’t used a Tack cloth before, it might just become your new best friend.
These cloths are awesome, minus the texture of the cloth itself, you’ll know what I mean once you use one.
These little tack cloths are great for picking up any dust on your project before you start staining. I use them all the time and they are pretty cheap on Amazon.
Now it’s time to flip over the table and sand the top. This is where the electric sander comes into play.
Use the same method with the sandpaper and the electric sander, 80, 150, 220 and 400 grit. I think it took around two hours to get all the varnish off both the top and the base of the table.
Staining Your Rustic Farmhouse Dining Table
Now on to the fun stuff!! Let’s see this table transform.
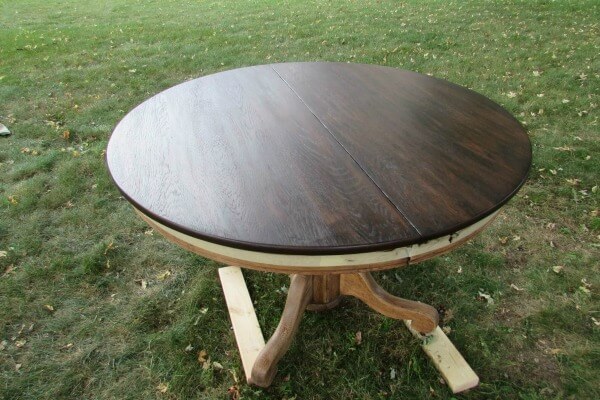
You can use any color of stain on the top of the table. We used Varathane KONA Wood Stain.
I personally love this color stain. We have used this color on multiple projects so it’s always our go-to stain.
Don’t forget, I highly recommend wearing gloves.
Either pick up some cheap plastic gloves or if all else fails use your kitchen gloves for washing dishes. You’ll be thankful you did when you’re done!
We taped off the table before staining the top so we wouldn’t get the stain on the rest of the table.
Dip your rag into the stain and start spreading it over the table.
Make sure to use a cloth that doesn’t have fuzz all over it, such as cotton. (We made the mistake of using a cut up shirt in the beginning).
Cover the table with stain using long strokes that follow the grain pattern. Let the stain sit for 5 minutes, then use another cloth to wipe all the excess stain off.
Repeat by adding more stain until you achieve your desired color!
Keep the weather in mind if you are staining outside. The temperature plays a role in how fast stain will or won’t dry. Staindoesn’t dry well if it’s hot and humid out or if it’s too cold.
Once you get your desired shade then you are done with the top.
Once you get your desired shade then you are done with the top.
All About That Base, Painting That Is
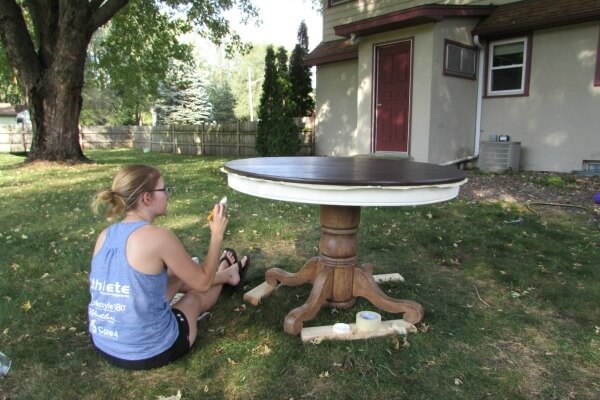
I knew I wanted a white base for our table so I decided to experiment with chalk paint. I went to Home Depot and bought the color Everlasting by Americana Décor.
I love how it turned out.
I ended up putting 3 coats on the base of the table before I got the desired look I was going for.
What I love about chalk paint is by the time I had the first coat on I could start with the second. Chalk paint only takes 15 minutes to dry.
When I was done painting, I did one coat of Crème Wax just to seal the table. It goes on so easy and it dries almost immediately.
When I was done painting, I did one coat of Crème Wax just to seal the table. It goes on so easy and it dries almost immediately.
Chalk paint tip: One benefit of using chalk paint is that you don’t have to sand before painting. I sanded our whole table before deciding to use chalk paint.
Finishing Touches On Your DIY Farmhouse Table
Finally, its time to poly the table. We like to use Varathane brand Polyurethane with a semi-gloss finish. This is our go-to poly because of the smooth finish it leaves and how easy it is to apply with a foam brush.
We did 3 coats to make sure it had extra protection since it’s a kitchen table.
If there are any rough spots in between applying the coats you can lightly sand it using 400 grit sandpaper.
Make sure to follow the wait times on the can in between applying the coats and enjoy your new farmhouse table!
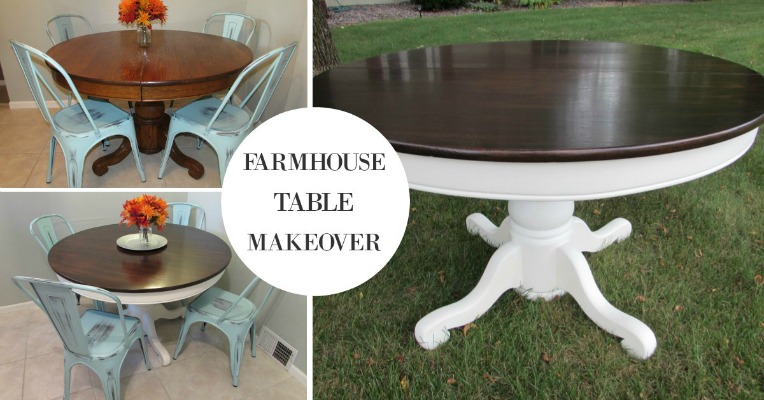
Finished Product
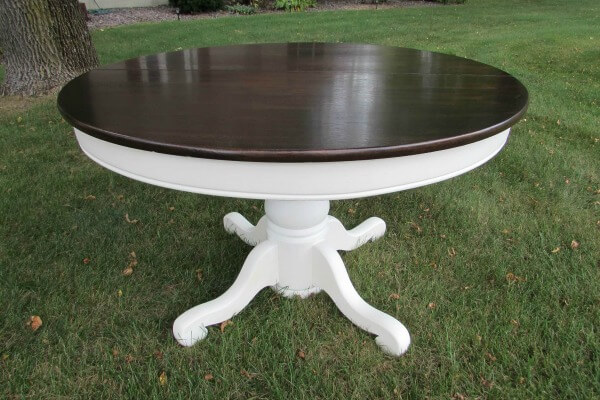
This project came about because we didn’t want to spend a ton of money on a new farmhouse table. We are all about saving money and we love a good project!
If you transform your old table into a DIY Farmhouse table let us know how it goes in the comments below!
Some of our favorite products:


Related articles:
- 10 Money Management Tips That Will Make You Rich Before Retirement
- Make Free Money Today With These Companies: Just By Using The Internet
- The Best Things To Buy At The Dollar Tree And What To Avoid
Our Favorite Resources:
Ibotta: This is by far my favorite app to get cash back when I shop in stores or online. Whether I’m buying groceries or going to Target for everyday essentials, Ibotta has great deals that you need to take advantage of! The other day I got $1.20 cash back from a $3.60 box of granola bars. When you signup with our link you’ll get a $10 welcome bonus.
Credit Sesame: Have you checked your credit score lately? I recommend checking your credit score at least once per year. My choice for getting a quick and FREE credit score check is Credit Sesame. They require a minimal amount of information to get your credit score and they have a bunch of other useful finance tools at your disposal.
Affiliate Marketing Help: If you run a blog and need help with your affiliate marketing game, you have to check out Making Sense of Affiliate Marketing. This extensive course shows you everything you need to monetize your blog. Making Sense of Affiliate Marketing has seriously changed the way we look at blogging and has helped us grow our blogging income substantially.
Ebates: If you do any shopping online you need to check outEbates. Much like Ibotta, Ebates will give you cash back when you shop online at your favorite stores. They partner with over 150 stores so you’ll be sure to find a store you love. Cashback amounts you can receive range from 1% up to 15% or more. When you sign up using our link you’ll get a $10 welcome bonus on your first purchase of $25 or more.