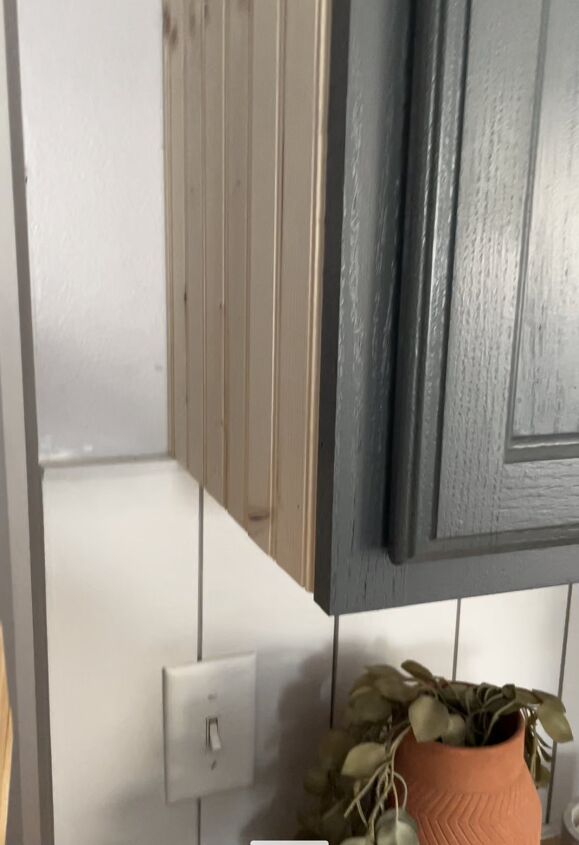
I added some scrap bead-board to the cabinet side as a little bit of an added design feature. I think it gives texture and interest to the space!
Next, I’ll construct the shelf/ledge.
This is similar to the construction of my DIY art ledge which you can read about in this post.
It’s really just taking 3 boards and putting them together with wood glue and nails. I used scraps that I already had but it’s similar to this pine from Home Depot. Honestly, ANY wood will do (you can even use MDF if you want to paint it!) Head over to your local store and look at the options available.
I cut mine down to fit the measurements of the outside of my cabinet and the space I had on the wall, then I stained it golden pecan in order to try to match closely to the butcher block counters I had installed on the coffee bar. You can finish your shelf however you want!
Next, I attached the shelf to my cabinets. I used my nail gun to pin it in place. I love the Ryobi battery operated nail gun for things like this! It’s so easy to use and you don’t have to worry about a compressor! My nail gun is probably my most-used tool!
Trending videos
Once the shelf was in place, I added a couple screws from the inside of the cabinet into the back of the shelf. You can’t see these from the outside at all but it adds some extra strength.
DIY holder hack
I needed something that would keep my cutting boards in place so they wouldn’t fall. I first thought about looking on amazon for a large handle. I couldn’t find anything that fit the size that I needed these to be. I needed it to match the width of that cabinet side as well as leave enough room for my cutting boards.
When you can’t find exactly what you need, you make it!
I decided to use wooden dowels since I needed to be able to attach it to the cabinet. Then, I found pipe connectors that would help me get the shape that I needed.
The beauty of this is that you can make it however you want! You can spray paint the whole thing, you can leave the connectors the copper color, you can stain the wooden dowels. Whatever you want!
Honestly, these would be great for so many things – barn door handles, book storage in a kids room, etc! Because my cutting boards are wood, I didn’t want to stain them and add a third wood tone. I liked the copper but thought it was too pink – it was clashing with my cabinet knobs. I decided to paint the whole thing black.
Once I painted it black, I fell in love with it! That being said, I got the idea of a third option: leave the dowels black but add rub and buff to the connectors so it would match the cabinet hardware! I’ll do that later though, first I just wanted to get these installed to see if it would even work.
I glued the dowels to the pipe connectors using rapid fuse super glue.
Installing the cutting board holders
This picture is a little hard to see (sorry about that) but what I did was use a scrap piece of wood as a spacer and then drilled a hole all the way through the side of the cabinet so I’d know where to put my screw.
If you look really closely, you can see the screw coming through the side of the cabinet. I put the holder bar over that screw and then used a handheld screwdriver to slowly tighten it. Because I was screwing from the inside of the cabinet, it was a little awkward and a handheld screwdriver helped me have better control.
Here’s a look at how I drilled the hole through the side of the cabinet:
Simply push the screw from the inside of the cabinet through to the outside, and line up the end of the wooden dowel so it goes directly into it.
You can check out my instagram account to see the entire project (It’s saved to the coffee bar highlight!)
Finish with details however you’d like
I ended up using the rub and buff on the pipe connectors. I love it so much, I think it matches the cabinet hardware perfectly!
Like I mentioned earlier, these can be finished however you want. You can stain, paint, use rub and buff, leave natural — whatever you want!
Honestly, I kind of want to build a barn door, paint it white, and then do this project again but much longer and with stained wood — ahhhh the possibilities are endless! This is a very versatile project!
Here’s a look at the finished project:
This is what it looked like before I used the rub and buff. I honestly like both but the rub and buff just gives it that little *extra*
Be sure to follow along on Instagram for more projects! I’m in stories almost daily and I’m always happy to answer any questions!
You can also check out my blog and subscribe to my insiders newsletter where I’ll send DIY projects, tips, and freebies right to your inbox!